MedITrak
Owner’s Manual
Table of Contents
1.0 Deliverables & System Specifications
Section 1.1: System Objectives 3
Section 1.2: Hardware, Software, and Human Interfaces 3
Section 1.3: Major Software functions 3
Section 1.4: Externally defined database 4
Section
1.5: Major design constraints and
limitations 4
Section 1.6: Functional Requirements Checklist 4
2.0 Blackboard Manual
Introduction
5
Section 2.1: Announcements 6
Section 2.2: Calendar 11
Section 2.3: Course Menu 17
Section 2.4: Digital Drop box 25
Section 2.5: Email 30
Section 2.6: Gradebook 37
Section 2.7: Manage Groups 44
Section 2.8: Staff Information 51
Section 2.9: Creating Tests 56
3.0 Blackboard Testing
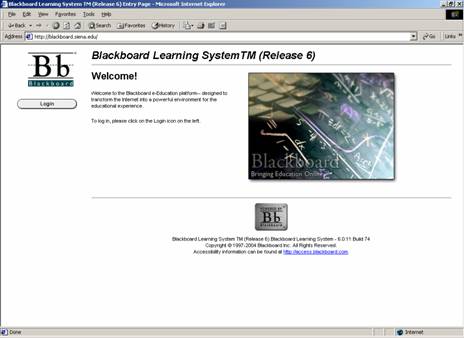
Section 3.1: Login Process 64
Section 3.2: Announcements 64
Section 3.3: Calendar 65
Section 3.4: Course Menu 66
Section 3.5: Digital Drop box 67
Section 3.6: Email 68
Section 3.7: Gradebook 70
Section 3.8: Manage Groups 71
Section 3.9: Staff Information 71
Section 3.10: Creating Tests 72
4.0 Health Professions Website Manual
Section 4.1: Website Navigation 73
Section 4.1.1: Health Professions Homepage 73
Section 4.1.2: Health Professions Office 74
Section 4.1.3: Professions 75
Section 4.1.4: Articulations 76
Section 4.1.5: Advisement Manual 77
Section 4.1.6: Blackboard Information 78
Section 4.1.7: Statistics 79
Section 4.1.8: Contact Information 80
Section 4.1.9: Site Map 81
Section 4.1.10:
5.0 Health Profession Website Testing
Section 5.1: Testing Plan 83
Section 5.2: Testing Criteria 83
Section 5.3: Test Case Forms 84
6.0 Glossary 92
1.0 Deliverables
& System Specifications
1.1
System Objectives
MediTrak uses the Blackboard Information System to keep track of Siena College Health Professions student’s information. Each User/Student is able to register in one of the following eleven categories on the system: Chiropractic, Dentistry, Medicine, Nursing, Occupational Therapy, Optometry, Osteopathic Medicine, Physical Therapy, Physician Assistant, Podiatry, and Veterinary Medicine.
Each user is able to modify and add content only to their
account on the Blackboard database.
MediTrak helps organize and keep track of the progress of each Health
Professions student as they seek admission in graduate programs in the Health
Professions. User/Student accounts have
limited access in the Blackboard system.
The Administrator account is able to create, modify, and view each
student’s progress throughout his/her academic career at
The Health Professions website has been created as a reference for the Health Professions students and all external users interested in the Health Professions career fields. The site will be maintained and kept up to date by Dr. LaRow and staff to remind students of deadlines and other news items of importance.
1.2 Hardware, Software, and Human Interface
Blackboard’s System has been configured for use with our MediTrak project. All the data stored in Blackboard by the User and Administrators will be saved on Blackboard’s Database. All users will work on the system through a web browser, Internet Explorer 6.0, Netscape Navigator 7.0, and Opera 7.0, since Blackboard will be accessed through a web interface.
1.3 Major Software Functions
MediTrak gives Dr. LaRow an electronic means to keep track of the Health Professions students he advises. The different features we have provided in the control panel of Blackboard gives Dr. LaRow the necessary functionality to maintain the progress of any student in his program. The Health Professions website offers information for external individuals who may be interested in the Health Professions program.
1.4 Externally Defined Database
MediTrak uses Blackboard’s Database, which is built into the Blackboard system.
1.5 Major Design Constraints and Limitations
A major constraint for developing MediTrak has been the limited flexibility we have to totally customize the system to the needs of the Health Professions. Blackboard is the creation of another development team; we have only been able to configure and work within their system to accommodate for our client’s needs in designing MediTrak. Time has been another constraint the development team of MediTrak has faced, since each phase of the project must be completed by its appropriate time on the project time line we have provided our clients.
1.6 Functional Requirements Checklist
|
Requirement |
[Met] |
[Unmet] |
|
Student able to login |
X |
|
|
Instructor able to login |
X |
|
|
Student able to access
designated features |
X |
|
|
Instructor able to access
all features |
X |
|
|
Student unable to access
administrative features |
X |
|
|
Instructor able to access
administrative features |
X |
|
|
Instructor able to manage
groups and records |
X |
|
|
Software contains client's
desired features |
X |
|
|
Client trained on operation
of software |
X |
|
2.0 Blackboard
Manual
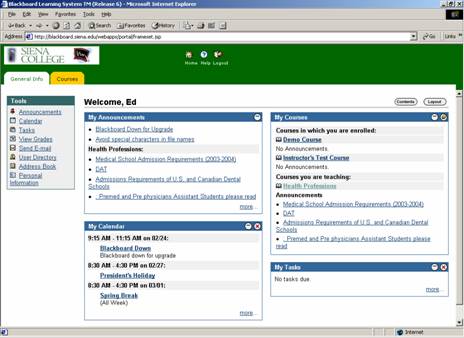
Introduction
The main purpose of the tutorials is to guide the client and future users of the Siena College Health Professions course.
The tutorials start with the login to Siena College Blackboard, and then proceed into the client’s (Dr. LaRow) user account. Next the tutorials navigate the reader to proceed to the Health Professions course. Inside the Health Profession course the tutorials directs the reader to the control panel option for the course instructor. The control panel lays out the feature option for the instructor.
The tutorials navigate the reader to that specified area where then they are directed to selected area links option. After the select one these options the tutorials navigate the reader to the options of adding, deleting, creating and other various options associated with these links.
2.1 Creating Health Professions
Announcements Tutorial
· Log into your account
· Under My Courses, left click the course title “Health Professions”
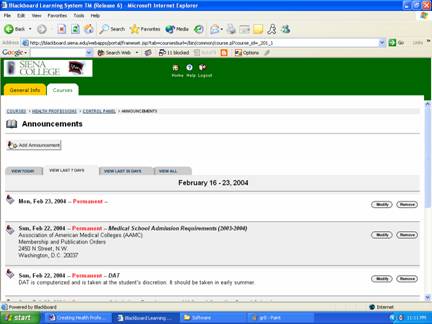
· On the left tool bar, left click on “Control Panel”
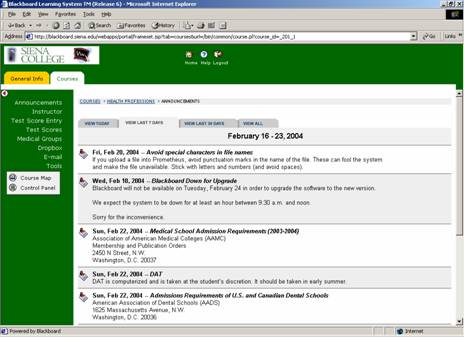
· In Course Tools, left click on “Announcements”

· To add an announcement left click “Add Announcements” button in the upper left of the page.
· In section 1, Announcement Information, enter in a title into the title field and the message you want displayed in the message field.
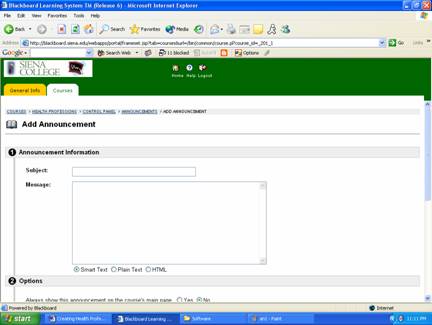
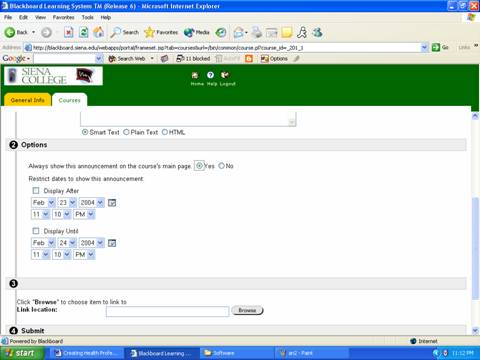
· In section 2, Options, left click the circle next to YES to make your announcement viewable for the health professions students forever or NO if you only want it as a one-time event. After you YES/NO clicked you may enter a desired timetable for your announcement to be viewed. Left click the square next to the “Display After” and “Display Until” and scroll the month, day, year, and time fields to the appropriate states.
· In section 3, if you want a link to accompany the announcement you may put a URL here.
· Once the page has been completed left click the submit button in the lower right of the page.
· A ratification page will appear after the data has been submitted. Left click OK to move on to the main Announcements page.

· The new announcement will be displayed for the desire timetable you entered.
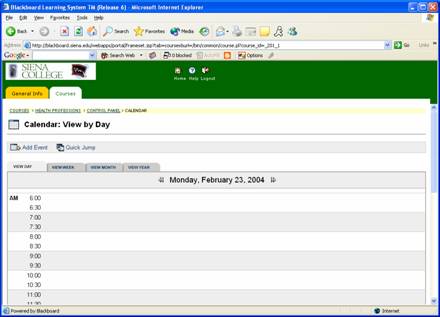
2.2 Creating Health Professions CALENDAR Tutorial
· Log into your account
· Under My Courses, left click the course title “Health Professions”

· On the left tool bar, left click on “Control Panel”
· In Course Tools, left click on “Course Calendar”
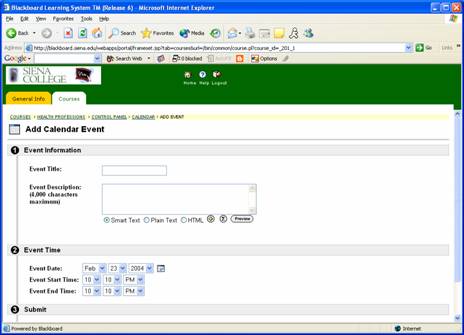
· To add a Calendar event left click “Add Event” button in the upper left of the page.

· In section 1, Event Information, enter in a title for the event along with a description in the corresponding fields.
·
In section 2, Event Time, enter the Event Date,
event start time, and event end time.
Note: if your event does not have an exact time just enter in a normal class
day schedule for
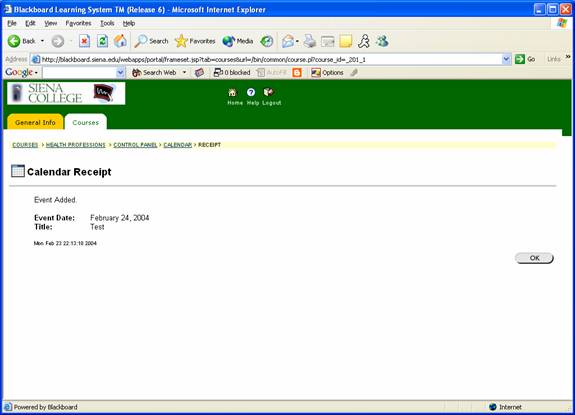
· Once those sections are completed left click submit in the lower left of the page.
· A page notifying the event has been added will appear. Left click submit to move to the main Calendar page.
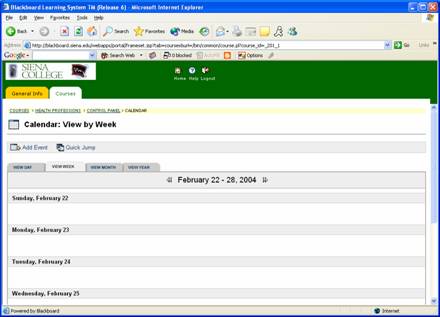
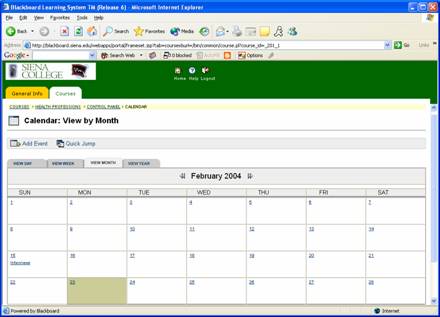
· To view different sections of your calendar left click the different tabs below located on the top of the page of the main calendar page.
o View day, to view events scheduled for today
o View week, to view events scheduled for the week
o View month, to view events scheduled for the month
o View year, to view events scheduled for the year.

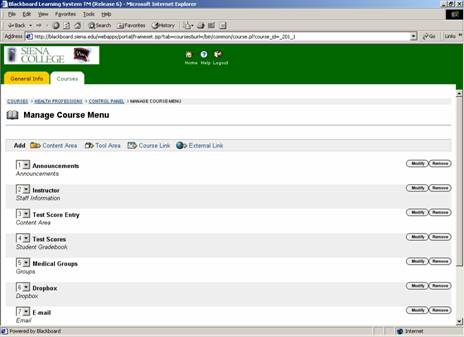
2.3 Managing Health Professions
Course Menu Tutorial
· Log into your account
· Under My Courses, left click the course title “Health Professions”
· On the left tool bar, left click on “Control Panel”
· In Course Options, left click on “Manage Course Menu”
ADDING A NEW CONTENT AREA
· To Add a Content area to the side bar for Blackboard, left click on “Content Area”
· Use the drop down list to select which area you would want show up on the side
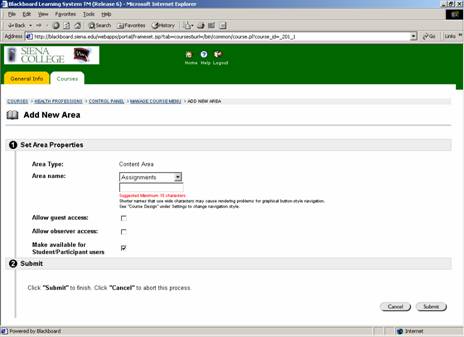
· Type in the name you desire to show up on the side
· Make sure “Make available for Student/Participant users” is checked
· Left click on “Submit”
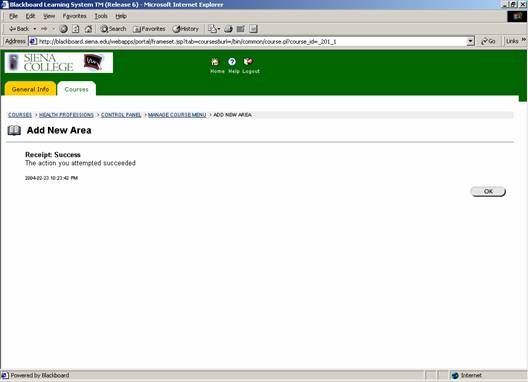
· Left click on “OK”
ADDING A NEW TOOL
· To Add a Tool area to the side bar for Blackboard, left click on “Tool Area”
· Use the drop down list to select which area you would want show up on the side
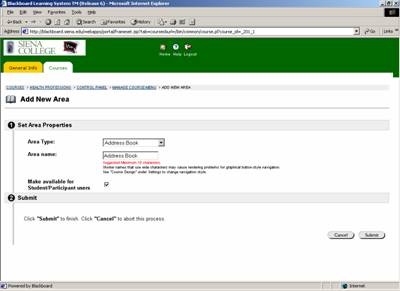
· Type in the name you desire to show up on the side
· Make sure “Make available for Student/Participant users” is checked
· Left click on “Submit”
· Left click on “OK”
ADDING A COURSE LINK
· To Add a Course Link to the side bar for Blackboard, left click on “Course Link”
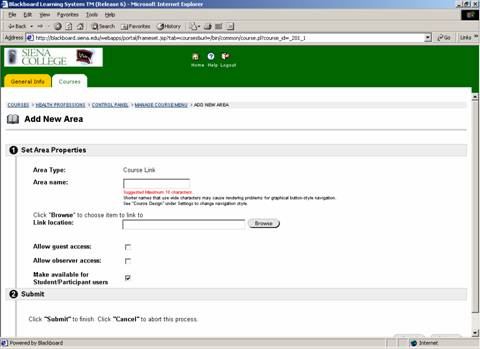
· Type in the name you desire to show up on the side
· Left click on “Browse” to find the link which you want to add
· Make sure “Make available for Student/Participant users” is checked
· Left click on “Submit”
· Left click on “OK”
ADDING AN EXTERNAL LINK
· To Add an External Link to the side bar for Blackboard, left click on “External Link”
· Type in the name you desire to show up on the side
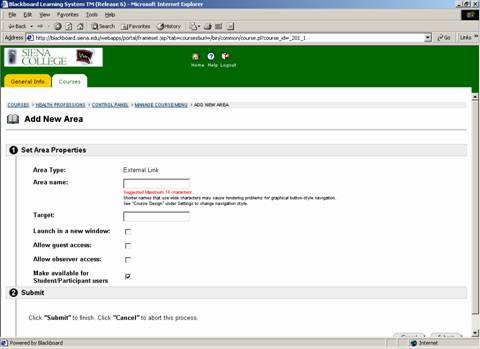
· Add in your target destination of your external web page, i.e. (http://www.espn.com)
· Left click on “Launch in a new window” check box if you want it to show up in a new window
· Make sure “Make available for Student/Participant users” is checked
· Left click on “Submit”
· Left click on “OK”
CHECKING ALL NEW ADDED FEATURES
For all of these newly added options you can manage them with these following steps
· You will now see that new menu option on your screen; you may reorder where it appears on the list by left clicking on the drop down and selecting which number it will appear at.
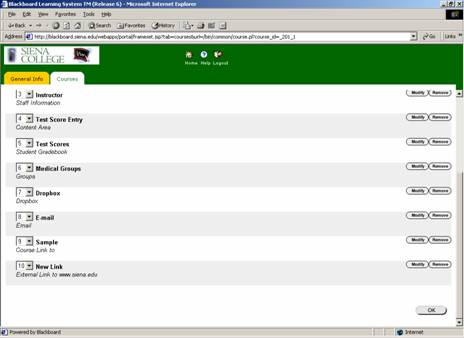
· Left click on “OK” to save this action and see it
· To remove one of these added menu options, simply left click on “Remove” on the right side of the screen.
· To modify one of these added menu options, click on “Modify”.
· Left click on “OK”
· This will allow you to change any of the information previously entered. Then left click on “OK” to save it
· Left click on “OK”
2.4 Managing Health Professions
Digital Drop Box Tutorial
· Log into your account
· Under My Courses, left click the course title “Health Professions”
· On the left tool bar, left click on “Control Panel”
· In Course Tools, left click on “Digital Drop Box”
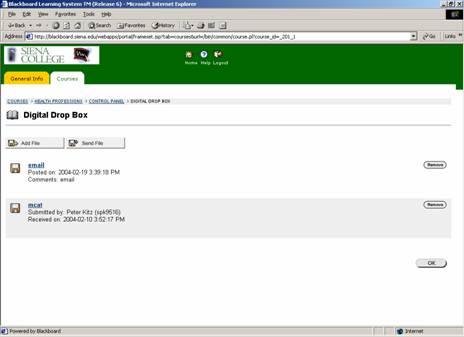
· To Add a file, left click on “Add File” at the top
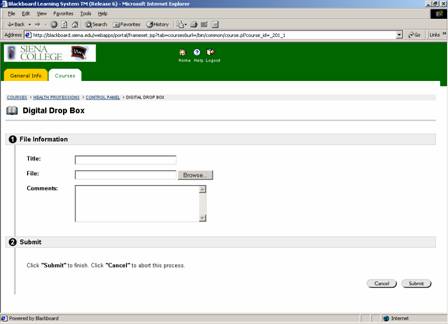
· Fill in the File information
· Left click on the “Browse” button and find the file you wish to add to the box
· Left click on “Submit”
· Drop box Receipt should say successful
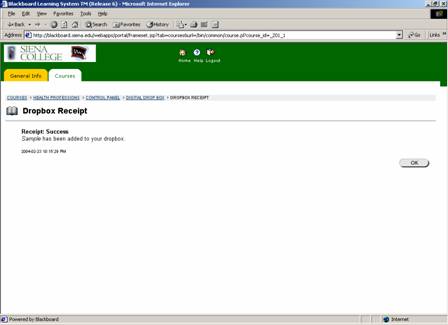
· Left click on “OK”
· To Send a file, left click on “Send File” at the top
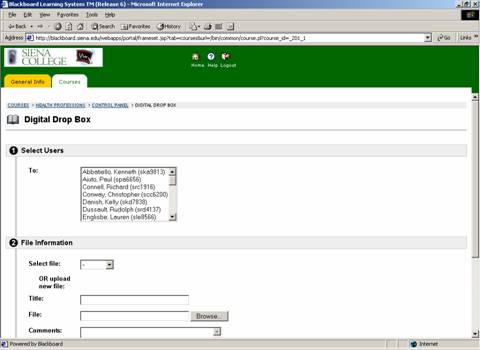
· Left click on the user you wish to send the file to
· Select the file you wish to send, by using the drop down menu
· OR
· Left click on the “Browse” button and find the file you wish to add to the box
· Left click on “Submit”
· Drop box Receipt should say successful
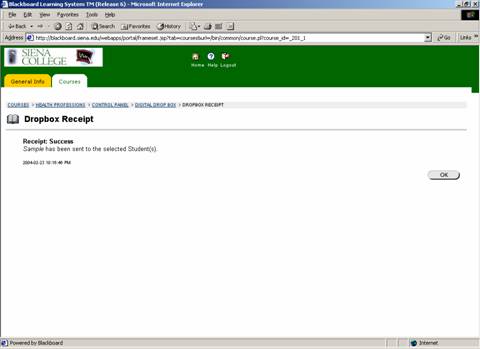
· Left click on “OK”
· To Remove a file, simply left click on the “Remove” on the file you wish to remove
· Left click on “OK” to the question if you want to do this or not
· Left click “OK” to the receipt
2.5 Creating Health Professions
E-mail Tutorial
· Log into your account
· Under My Courses, left click the course title “Health Professions”
· On the left tool bar, left click on “Control Panel”
·
In Course Tools, left click on “Send E-mail”
·
Choose which user or group of users you wish to
send emails to
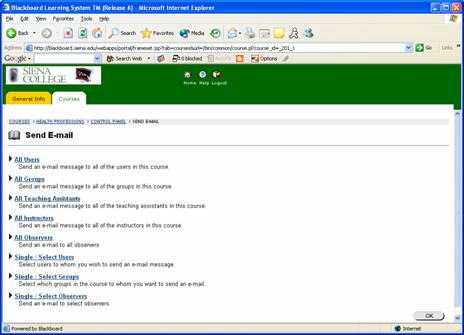
EMAILING ALL
·
Left click on “All Users” if you wish to send an
email to everyone
·
Left click on “All Groups” if you wish to have
all groups be emailed
·
Left click on “All Teaching Assistants” if you
wish to have all teaching assistants be emailed.
·
Left
click on “All Instructors” if you wish to have all instructors emailed
·
Left
click on “All Observers” if you wish to have all observers of the course be
emailed.
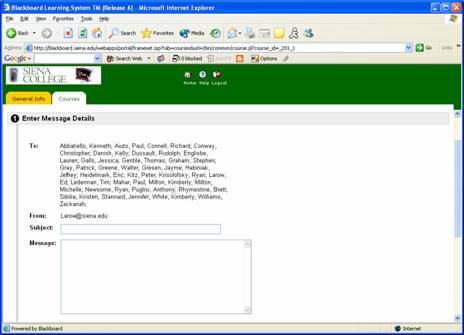
For all of these email options, the following steps are the
same!!
·
Fill in the subject, message and left click to
add an attachment on “Add”
·
Left click on browse and find the file you want
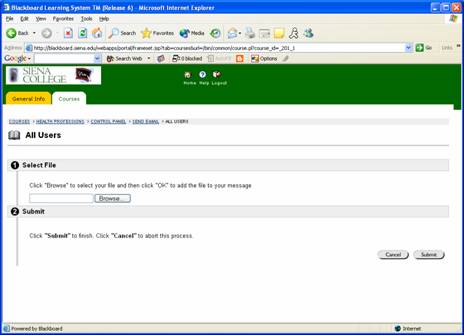
·
Left click on “Submit”
·
If you do not wish to attach that file, left
click on “Remove” next to the file name
·
Left click on “Submit” to submit the email
·
Left click “OK”
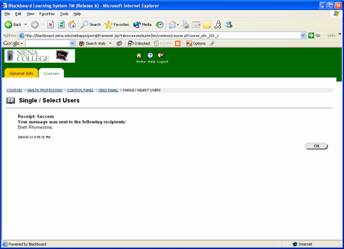
EMAILING INDIVIDUALS
·
To
select a single user or a select number to email, left click on “Single /
Select Users”
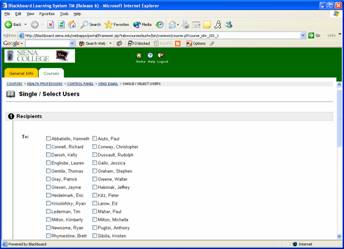
·
Left
click on the check box next to the name of the person you wish to email
·
Fill in the subject, message and left click to
add an attachment on “Add”
·
Left click on browse and find the file you want, then left click on “Submit”
·
If you do not wish to attach that file, left
click on “Remove” next to the file name
·
Left click on “Submit” to submit the email
·
Left click “OK”
EMAILING GROUPS
·
To
select a single group or a select number to email, left click on “Single /
Select Groups”

·
Left
click on the check box next to the name of the group you wish to email
·
Fill in the subject, message and left click to
add an attachment on “Add”
·
Left click on browse and find the file you want
·
Left click on “Submit”
·
If you do not wish to attach that file, left
click on “Remove” next to the file name
·
Left click on “Submit” to submit the email
·
Left click “OK”
EMAILING OBSERVERS
·
To
select a single observer or a select number to email, left click on “Single / Select
Observers”
·
Left
click on the check box next to the name of the observer you wish to email
·
Fill in the subject, message and left click to
add an attachment on “Add”
·
Left click on browse and find the file you want
·
Left click on “Submit”
·
If you do not wish to attach that file, left
click on “Remove” next to the file name
·
Left click on “Submit” to submit the email
·
Left click “OK”
2.6 Creating
Health Professions Gradebook Tutorial
· Log into your account
· Under My Courses, left click the course title “Health Professions”
· On the left tool bar, left click on “Control Panel”
· In Assessment, left click on “Gradebook ”
· A spreadsheet list of all active students in the Health Professions Coarse will appear and the list of the various types of medical exams.
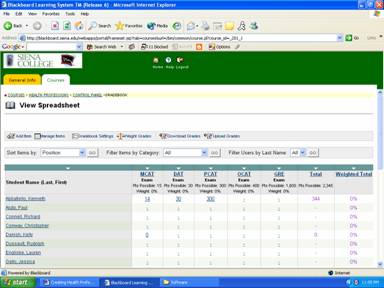
· If a student has not entered his/her test score yet underneath the exam will only appear a dashed line.
· If a student has entered in his/her test score underneath the exam will appear an exclamation point “!”.
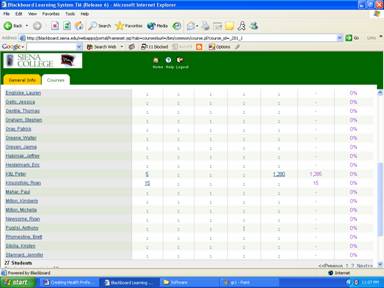
· To enter the score into your Blackboard Gradebook left click “!”.
· You are now in the Modify Grade section that lists the student’s name, the test’s name and dates of submission, grade section, and possible points of the exam.
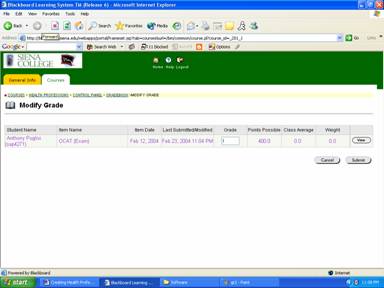
· To view the students score left click “view” at the end of the information listing.
· At the bottom of this page you will a field called “Question 1 Essay”, the student entered score. The score is located to the right of “Given Answer”.
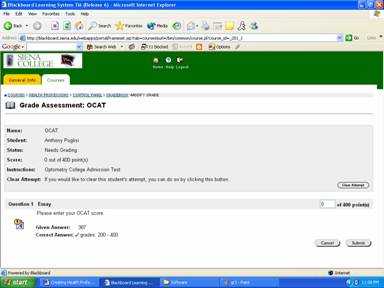
· To see the score on the spreadsheet of grades you must enter his/her given score into the box to the left of “of (point total) point(s)”.
· Left click submit in the lower right corner.
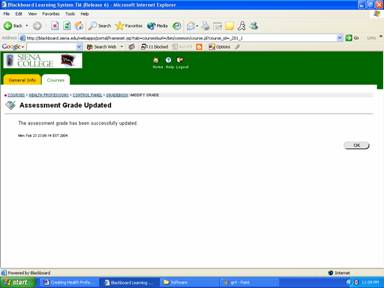
· You will now be at the “Assessment Grade Updated” page; the page should display the message “The assessment grade has been successfully updated.” If it was a successful. Left click OK in to the right of the page.
· Back in the Modify Grade section, it should show the exam grade in the list now.
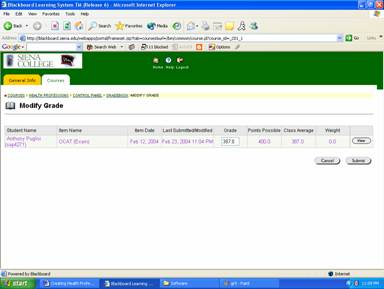
· Left click submit.
· You are now at “Grade Updated” page notifying you that the grade has been updated.
· Left click OK.

· The spreadsheet will now display the student’s grade for that exam.

2.7 Creating Health Professions
Manage Groups Tutorial
· Log into your account
· Under My Courses, left click the course title “Health Professions”
· On the left tool bar, left click on “Control Panel”

· In User Management, left click on “Manage Groups ”
· To add a group, left click on “Add Group” to the upper left on the page.
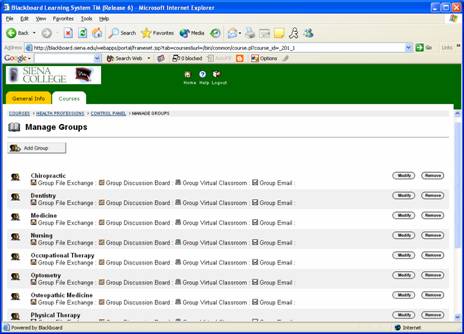
· Section 1, Main Group Information, create a group name and enter in a description for the group.
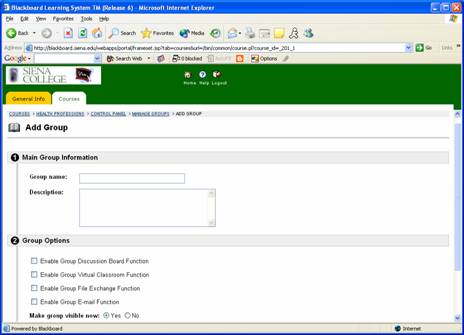
· Section 2, Group Options, left click the squares next to each of those fields making them active. Also make sure the group is visible by left clicking the circle next to YES.
· Left click submit to create group.
· You will be brought to a screen telling you the group was successfully made. Left click OK.
· You are now back at the main Manage Groups page.
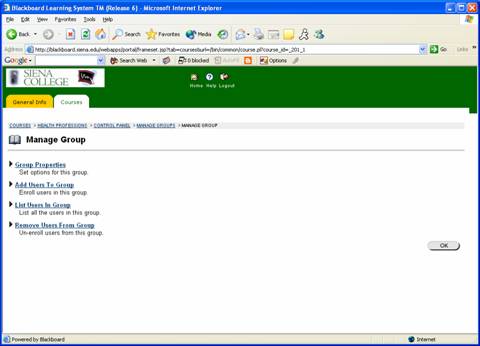
· Now to add students to a group you must left click the modify option to the right of the group you wish to add a student to.
· You are now at the Manage Group page, to add a student to a group left click “Add Users In Group”.
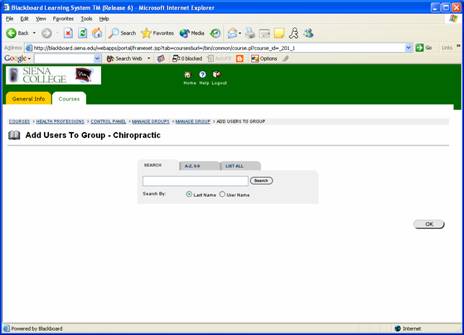
· You are now at the Add Users To Group page; left click the list all tab to the right of the gray box. Then left click list all.
· Find the user(s) in the list to add to the group. Left click the box next to the students name to add them to the group.
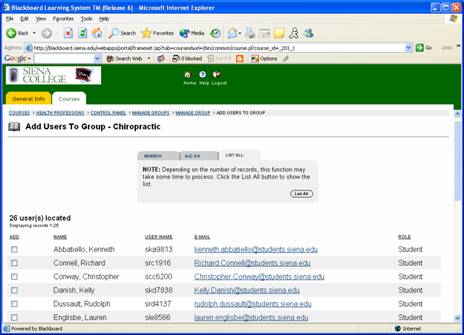
· Left click submit when you have pick all the user(s) for that group.
· You will be brought to a validation page telling whether it was a successful or unsuccessful add. Left click ok.
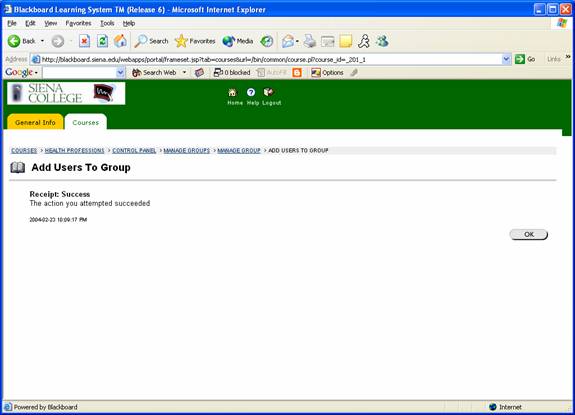
· Left click “Ok” on the Manage Group page to return to the Group Listings.
2.8 Creating Health Professions Staff Information
Tutorial
· Log into your account
· Under My Courses, left click the course title “Health Professions”
· On the left tool bar, left click on “Control Panel”
· In Course Tools, left click on “Staff Information ”
· In the Add tool bar on the top, left click on the “Profile” option
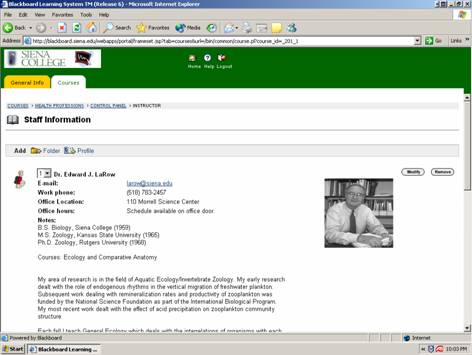
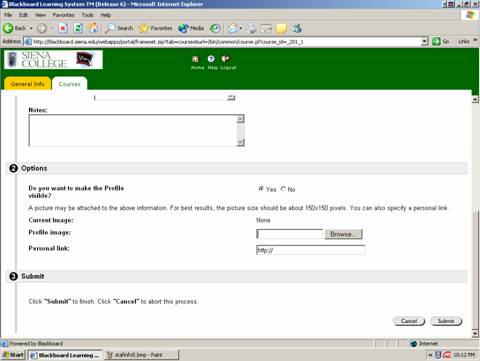
· In section 1, Profile Information, fill out all necessary information for creating your profile

· In section 2, Options, left click the option YES to make your profile visible.
· The “Profile image” will allow you to add a picture of yourself. Left click on “Browse…” and search your computer for an image to upload.
· The “Personal Link” may be a section where you could enter in the Health Professions Website link.
· At the bottom, left click on “Submit”
· The profile is now added. If you need to update/change this profile at anytime left click the modify button to the left and make any necessary changes.
2.9 Creating Health Professions
Tests Tutorial
· Log into your account
· Under My Courses, left click the course title “Health Professions”
· On the left tool bar, left click on “Control Panel”

· In Content Areas, left click on “Test Score Entry ”

· In the Add tool bar on the top, left click on the “Test” option
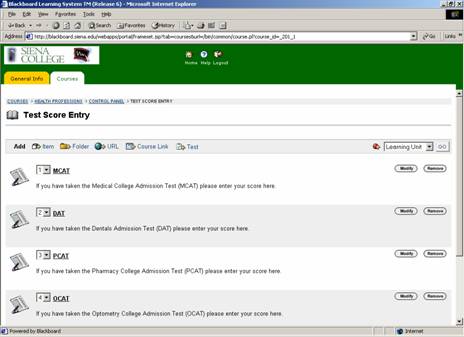
· Under 1. Add Test, left click the circle “Create”
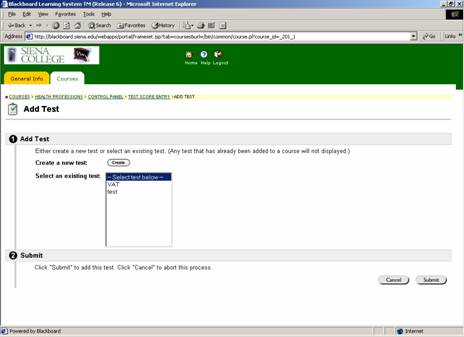
· Fill out all necessary information for labeling the Test
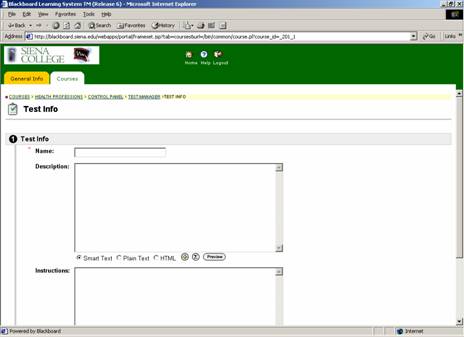
· At the bottom, left click on “Submit”
· In the Add Question tool bar at the top, left click on the drop down list, and choose “Essay”, then left click on “Go”
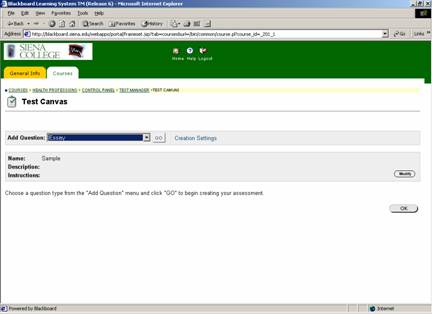
· Fill out Question Test with “Enter the score of (desired test):”

· Fill out Point value with the maximum number score for that test
· Fill out Answer with the grade ranges from this particular test
· At the bottom, left click on “Submit”
· Under “Add Question Here,” left click on “OK”
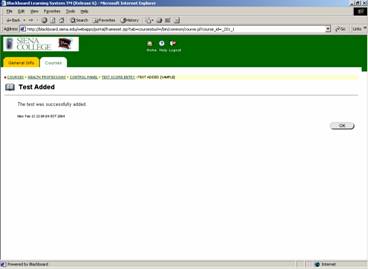
· Highlight the test, which you just create and left click on it, then left click on “Submit” at the bottom right.
· You should see “The test was successfully added.” And then left click on “OK”
· Left click on “Modify the test options”
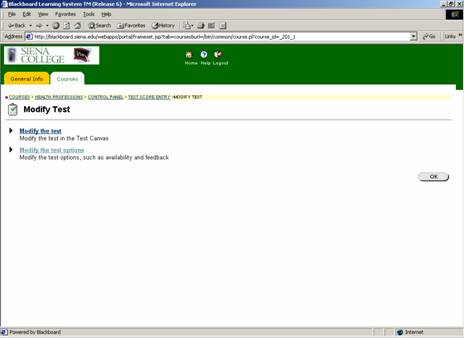
·
Under the heading “2. Test Availability”,
next to “Do you want to
make the link visible?”, left click on “Yes”
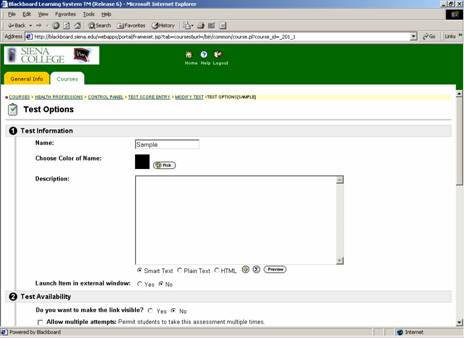
·
At the bottom
of the page, left click on “Submit”
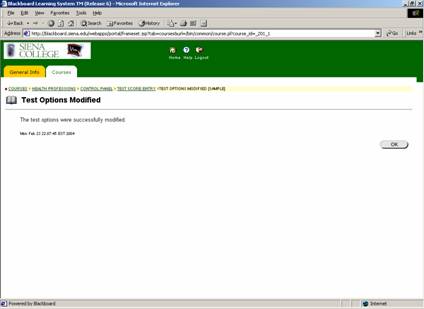
·
You should see
“The test
options were successfully modified.” And then left click on “OK”
·
Left click on “OK”
·
You should see a list of your Tests which have been created
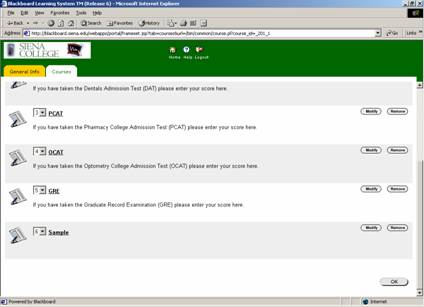
·
Scroll down to the bottom and left click on “OK”
3.0 Blackboard
Testing
To further enhance the quality of our product, we have
conducted in-depth testing of each MediTrak feature. These tests ensure that
our functional requirements have been met and each feature works to a
satisfactory level.
3.1 Test #1: Testing of Login Process
|
Test #1 |
Tested by Tony Puglisi, |
|
|
|
[TEST OBJECT] |
[EXPECTED RESULT] |
[PASS] |
[FAIL] |
|
Login
as Student User |
Successful
Login |
PASS |
|
|
Login
as Instructor |
Successful
Login |
PASS |
|
|
Login
as Non-User |
Unsuccessful
Login |
PASS |
|
3.2 Test #2: Testing of “Add Announcement” Feature
|
Test #2 |
Tested by Peter Kitz, |
|
|
|
[TEST OBJECT] |
[EXPECTED RESULT] |
[PASS] |
[FAIL] |
|
Clicking on Announcements |
Brought to Announcements
Page |
PASS |
|
|
Clicking on Add
Announcement Button |
Brought to Add Announcement
Submission Page |
PASS |
|
|
Clicking on Submit Button |
Announcement Completion
Receipt |
PASS |
|
|
Click Ok Button |
Brought to Announcements
Page w/ it added |
PASS |
|
|
Clicking on Cancel Button |
Brought back to
Announcements Page |
PASS |
|
|
Clicking on Modify Button |
Brought to Modify
Announcements Page |
PASS |
|
|
Clicking on Submit Button |
Updated Announcement
Completion Receipt |
PASS |
|
|
Click Ok Button |
Brought to Announcements
Page w/ update added |
PASS |
|
|
Clicking on Cancel Button |
Brought back to
Announcements Page |
PASS |
|
|
Clicking on Remove Button |
Dialog box shown asking for
deletion confirmation |
PASS |
|
|
Clicking Ok Button |
Announcement Deleted |
PASS |
|
|
Clicking Cancel Button |
Brought back to
Announcements Page |
PASS |
|
|
Click Ok |
Brought back to Control
Panel |
PASS |
|
3.3 Test
#3: Testing of “Course Calendar” Feature
|
Test #3 |
Tested by Peter Kitz, |
|
|
|
[TEST OBJECT] |
[EXPECTED RESULT] |
[PASS] |
[FAIL] |
|
Clicking on Course Calendar |
Brought to Calendar showing
current day's activities |
PASS |
|
|
Clicking on View Day |
Calendar shows activities
for that day |
PASS |
|
|
Clicking on View Week |
Calendar shows activities
for the week |
PASS |
|
|
Clicking on View Month |
Calendar shows that day
highlighted in that month |
PASS |
|
|
Clicking on View Year |
Calendar shows all months
with that day highlighted |
PASS |
|
|
Clicking on Add Event |
Brought to Add Event Page |
PASS |
|
|
Clicking on Submit Button |
Submission Completion
Message / Event Added |
PASS |
|
|
Click Ok Button |
Brought to Events Page w/
it added |
PASS |
|
|
Clicking on Cancel Button |
Brought back to Calendar
Page |
PASS |
|
|
Clicking on Quick Jump |
Brought to Calendar Quick
Jump Page |
PASS |
|
|
Clicking on Submit Button |
Shown data for day, week,
or year looking to be viewed |
PASS |
|
|
Clicking on Cancel Button |
Brought back to Calendar
Page |
PASS |
|
|
Clicking on Modify Event |
Brought to Modify Event
Page |
PASS |
|
|
Clicking on Submit Button |
Updated Event Completion
Receipt |
PASS |
|
|
Click Ok Button |
Brought to Events Page w/
update added |
PASS |
|
|
Clicking on Cancel Button |
Brought back to Calendar
Page |
PASS |
|
|
Clicking on Remove Button |
Dialog box shown asking for
deletion confirmation |
PASS |
|
|
Clicking Ok |
Event Removed |
PASS |
|
|
Clicking Cancel |
Brought back to Calendar
Page |
PASS |
|
|
Click Ok |
Brought back to Control
Panel |
PASS |
|
3.4 Test #4: Testing of “Course Menu” Feature
|
Test #4 |
Tested by Peter Kitz, |
|
|
|
[TEST OBJECT] |
[EXPECTED RESULT] |
[PASS] |
[FAIL] |
|
Clicking on Manage Course
Menu |
Brought to Manage Course
Menu Page |
PASS |
|
|
Clicking on Add Content
Area |
Brought to Add Content Area
Page |
PASS |
|
|
Clicking on Submit Button |
Add Content Area
Confirmation Receipt |
PASS |
|
|
Click Ok |
Brought back to Manage
Course Menu Page w/ it added |
PASS |
|
|
Clicking on Cancel Button |
Brought back to Manage
Course Menu Page |
PASS |
|
|
Clicking on Add Tool Area |
Brought to Add Tool Area
Page |
PASS |
|
|
Clicking on Submit Button |
Add Tool Area Confirmation
Receipt |
PASS |
|
|
Click Ok |
Brought back to Manage
Course Menu Page w/ it added |
PASS |
|
|
Clicking on Cancel Button |
Brought back to Manage
Course Menu Page |
PASS |
|
|
Clicking on Add Course Link |
Brought to Add Course Link
Page |
PASS |
|
|
Clicking Browse |
Area Selection Pop-Up
displays |
PASS |
|
|
Clicking Submit Button |
Area Selection placed in
link location |
PASS |
|
|
Clicking Cancel Button |
Nothing placed in link
location |
PASS |
|
|
Clicking on Submit Button |
Add Course Link
Confirmation Receipt |
PASS |
|
|
Click Ok |
Brought back to Manage
Course Menu Page w/ it added |
PASS |
|
|
Clicking on Cancel Button |
Brought back to Manage
Course Menu Page |
PASS |
|
|
Clicking on Add External
Link |
Brought to Add External
Page |
PASS |
|
|
Clicking on Submit Button |
Add External Link
Confirmation Receipt |
PASS |
|
|
Click Ok |
Brought back to Manage
Course Menu Page w/ it added |
PASS |
|
|
Clicking on Cancel Button |
Brought back to Manage
Course Menu Page |
PASS |
|
|
Changing Priority Icon
(Drop Down) |
Moves that item to desired
spot and others adjusted accordingly |
PASS |
|
|
Clicking on Modify Button |
Brought to Modify Page for
that item |
PASS |
|
|
Clicking on Submit Button |
Update Confirmation Receipt |
PASS |
|
|
Click Ok |
Brought back to Manage
Course Menu Page w/ update added |
PASS |
|
|
Clicking on Cancel Button |
Brought back to Manage
Groups Page (no modification) |
PASS |
|
|
Clicking on Remove Button |
Dialog box shown asking for
deletion confirmation |
PASS |
|
|
Click Ok |
Item deleted |
PASS |
|
|
Click Cancel |
Item not deleted |
PASS |
|
|
Click Ok |
Brought back to Control
Panel |
PASS |
|
3.5 Test #5: Testing of “Digital Drop Box”
Feature
|
Test #5 |
Tested by Ryan
Krisolosky, |
|
|
|
[TEST OBJECT] |
[EXPECTED RESULT] |
[PASS] |
[FAIL] |
|
Clicking on Digital Drop
Box |
Brought to Digital Drop Box
Page |
PASS |
|
|
Clicking on Add File |
Brought to Add File Page |
PASS |
|
|
Clicking on Browse |
Pop-Up for file selection
is displayed |
PASS |
|
|
Clicking on Open |
Filename and path is placed
in File section |
PASS |
|
|
Clicking on Cancel |
Nothing is placed in File
section |
PASS |
|
|
Clicking on Submit Button |
Add File Confirmation
Receipt |
PASS |
|
|
Click Ok |
Brought back to Digital
Drop Box Page w/ it added |
PASS |
|
|
Clicking on Cancel |
Brought back to Digital
Drop Box Page |
PASS |
|
|
Clicking on Send File |
Brought to Send File Page |
PASS |
|
|
Clicking on Browse |
Pop-Up for file selection
is displayed |
PASS |
|
|
Clicking on Open |
Filename and path is placed
in File section |
PASS |
|
|
Clicking on Cancel |
Nothing is placed in File
section |
PASS |
|
|
Clicking on Submit Button |
Send File Confirmation
Receipt |
PASS |
|
|
Click Ok |
Brought back to Digital
Drop Box Page |
PASS |
|
|
Clicking on Cancel |
Brought back to Digital
Drop Box Page |
PASS |
|
|
Clicking on Remove Button |
Dialog box shown asking for
deletion confirmation |
PASS |
|
|
Click Ok |
Item deleted |
PASS |
|
|
Click Cancel |
Item not deleted |
PASS |
|
|
Click Ok |
Brought back to Control
Panel |
PASS |
|
3.6 Test #6: Testing of “Send E-mail” Feature
|
Test #6 |
Tested by Ryan
Krisolosky, |
|
|
|
[TEST OBJECT] |
[EXPECTED RESULT] |
[PASS] |
[FAIL] |
|
Clicking on Send E-mail |
Brought to Send E-mail Page |
PASS |
|
|
Clicking on All Users |
Brought to E-mail page with
all users as recipients |
PASS |
|
|
Clicking on Add Attachment |
Brought to Attachment Page |
PASS |
|
|
Clicking on Submit Button |
Attachment Added / Back to
E-mail page |
PASS |
|
|
Clicking on Cancel Button |
No Attachment Added / Back
to E-mail page |
|
FAIL |
|
Clicking on Submit Button |
E-mail Completion Receipt |
PASS |
|
|
Click Ok Button |
Brought to Send E-mail Page |
PASS |
|
|
Clicking on Cancel Button |
Brought back to Send E-mail
Page |
PASS |
|
|
Clicking on All Groups |
Brought to E-mail page with
all users in all groups as recipients |
PASS |
|
|
Clicking on Add Attachment |
Brought to Attachment Page |
PASS |
|
|
Clicking on Submit Button |
Attachment Added / Back to
E-mail page |
PASS |
|
|
Clicking on Cancel Button |
No Attachment Added / Back
to E-mail page |
|
FAIL |
|
Clicking on Submit Button |
E-mail Completion Receipt |
PASS |
|
|
Click Ok Button |
Brought to Send E-mail Page |
PASS |
|
|
Clicking on Cancel Button |
Brought back to Send E-mail
Page |
PASS |
|
|
Clicking on All Teaching
Assistants |
Brought to E-mail page with
all teaching assistants as recipients |
PASS |
|
|
Clicking on Add Attachment |
Brought to Attachment Page |
PASS |
|
|
Clicking on Submit Button |
Attachment Added / Back to
E-mail page |
PASS |
|
|
Clicking on Cancel Button |
No Attachment Added / Back
to E-mail page |
|
FAIL |
|
Clicking on Submit Button |
E-mail Completion Receipt |
PASS |
|
|
Click Ok Button |
Brought to Send E-mail Page |
PASS |
|
|
Clicking on Cancel Button |
Brought back to Send E-mail
Page |
PASS |
|
|
Clicking on All Instructors |
Brought to E-mail page with
all instructors as recipients |
PASS |
|
|
Clicking on Add Attachment |
Brought to Attachment Page |
PASS |
|
|
Clicking on Submit Button |
Attachment Added / Back to
E-mail page |
PASS |
|
|
Clicking on Cancel Button |
No Attachment Added / Back
to E-mail page |
|
FAIL |
|
Clicking on Submit Button |
E-mail Completion Receipt |
PASS |
|
|
Click Ok Button |
Brought to Send E-mail Page |
PASS |
|
|
Clicking on Cancel Button |
Brought back to Send E-mail
Page |
PASS |
|
|
Clicking on All Observers |
Brought to E-mail page with
all observers as recipients |
PASS |
|
|
Clicking on Add Attachment |
Brought to Attachment Page |
PASS |
|
|
Clicking on Submit Button |
Attachment Added / Back to
E-mail page |
PASS |
|
|
Clicking on Cancel Button |
No Attachment Added / Back
to E-mail page |
|
FAIL |
|
Clicking on Submit Button |
E-mail Completion Receipt |
PASS |
|
|
Click Ok Button |
Brought to Send E-mail Page |
PASS |
|
|
Clicking on Cancel Button |
Brought back to Send E-mail
Page |
PASS |
|
|
Clicking on Single / Select
Users |
Brought to E-mail page
where you can select user recipients |
PASS |
|
|
Clicking on Add Attachment |
Brought to Attachment Page |
PASS |
|
|
Clicking on Submit Button |
Attachment Added / Back to
E-mail page |
PASS |
|
|
Clicking on Cancel Button |
No Attachment Added / Back
to E-mail page |
|
FAIL |
|
Clicking on Submit Button |
E-mail Completion Receipt |
PASS |
|
|
Click Ok Button |
Brought to Send E-mail Page |
PASS |
|
|
Clicking on Cancel Button |
Brought back to Send E-mail
Page |
PASS |
|
|
Clicking on Single / Select
Groups |
Brought to E-mail page
where you can select group recipients |
PASS |
|
|
Clicking on Add Attachment |
Brought to Attachment Page |
PASS |
|
|
Clicking on Submit Button |
Attachment Added / Back to
E-mail page |
PASS |
|
|
Clicking on Cancel Button |
No Attachment Added / Back
to E-mail page |
|
FAIL |
|
Clicking on Submit Button |
E-mail Completion Receipt |
PASS |
|
|
Click Ok Button |
Brought to Send E-mail Page |
PASS |
|
|
Clicking on Cancel Button |
Brought back to Send E-mail
Page |
PASS |
|
|
Clicking on Single / Select
Observers |
Brought to E-mail page
where you can select observer
recipients |
PASS |
|
|
Clicking on Add Attachment |
Brought to Attachment Page |
PASS |
|
|
Clicking on Submit Button |
Attachment Added / Back to
E-mail page |
PASS |
|
|
Clicking on Cancel Button |
No Attachment Added / Back
to E-mail page |
|
FAIL |
|
Clicking on Submit Button |
E-mail Completion Receipt |
PASS |
|
|
Click Ok Button |
Brought to Send E-mail Page |
PASS |
|
|
Clicking on Cancel Button |
Brought back to Send E-mail
Page |
PASS |
|
|
Click Ok |
Brought back to Control
Panel |
PASS |
|
3.7 Test #7: Testing of “Gradebook” Feature
|
Test #7 |
Tested by Tony Puglisi, |
|
|
|
[TEST OBJECT] |
[EXPECTED RESULT] |
[PASS] |
[FAIL] |
|
Clicking on Gradebook |
Able to view spreadsheet of
scores for all active students |
PASS |
|
|
Clicking on Add Item |
Brought to add item page |
PASS |
|
|
Clicking on Submit Button |
Add Item receipt shown |
PASS |
|
|
Click Ok |
Brought back to Gradebook
page |
PASS |
|
|
Clicking on Cancel Button |
Brought back to Gradebook
page |
PASS |
|
|
Clicking on Manage Items |
Brought to manage items
page |
PASS |
|
|
Clicking on Modify |
Brought to modify item page |
PASS |
|
|
Clicking on Submit Button |
Update Completion receipt |
PASS |
|
|
Click Ok |
Brought back to manage
items page |
PASS |
|
|
Clicking on Cancel Button |
Brought back to manage
items page |
PASS |
|
|
Clicking on Remove* |
Item deleted / Brought back
to page |
PASS |
|
|
Changing Priority Icon
(Drop Down) |
Moves that item to desired
spot and others adjusted accordingly |
PASS |
|
|
Clicking on ! for a
student's score |
Brings you to modify grade
page |
PASS |
|
|
Clicking View Button |
Brings you to Grade
Assessment for that particular exam |
PASS |
|
|
Clicking Clear Attempt |
Will clear student's
attempt for the grade / back to grade pg. |
PASS |
|
|
Clicking Submit Button |
Shown Assessment Grade
Updated |
PASS |
|
|
Click Ok |
Brought to modify grade
page with score entered in grade field |
PASS |
|
|
Clicking Cancel Button |
Brought to modify grade
page with no score entered |
PASS |
|
|
Clicking Submit Button |
Grade Updated Successfully
Shown |
PASS |
|
|
Click Ok |
Brought back to Gradebook
page |
PASS |
|
|
Clicking Cancel Button |
Brought back to Gradebook
page w/ no update made |
PASS |
|
|
Click Ok |
Brought back to Control
Panel |
PASS |
|
3.8 Test #8: Testing of “Manage Groups” Feature
|
Test #8 |
Tested by Tony Puglisi, |
|
|
|
[TEST OBJECT] |
[EXPECTED RESULT] |
[PASS] |
[FAIL] |
|
Clicking on Manage Groups |
Brought to Manage Groups
Page |
PASS |
|
|
Clicking on Add Group |
Brought to Add Group Page |
PASS |
|
|
Clicking on Submit Button |
Add Group Confirmation
Receipt |
PASS |
|
|
Click Ok |
Brought back to Manage
Groups Page |
PASS |
|
|
Clicking on Cancel Button |
Brought back to Manage
Groups Page (no group added) |
PASS |
|
|
Clicking on Modify Button |
Brought to Modify Group
Page |
PASS |
|
|
Clicking on Submit Button |
Modify Group Confirmation
Receipt |
PASS |
|
|
Click Ok |
Brought back to Manage
Groups Page |
PASS |
|
|
Clicking on Cancel Button |
Brought back to Manage
Groups Page (no group modified) |
PASS |
|
|
Clicking on Remove Button |
Dialog box shown asking for
deletion confirmation |
PASS |
|
|
Click Ok |
Group deleted |
PASS |
|
|
Click Cancel |
Group not deleted |
PASS |
|
|
Click Ok |
Brought back to Control
Panel |
PASS |
|
3.9 Test #9: Testing of “Staff Information”
Feature
|
Test #9 |
Tested by Brett
Rhymestine, |
|
|
|
[TEST OBJECT] |
[EXPECTED RESULT] |
[PASS] |
[FAIL] |
|
Clicking on Staff
Information |
Brought to Staff
Information Page |
PASS |
|
|
Clicking on Add Folder
(+Folder) |
Brought to Add Folder Page |
PASS |
|
|
Clicking on Submit Button |
Add Folder Completion
Receipt |
PASS |
|
|
Click Ok Button |
Brought to Staff
Information Page w/ folder added |
PASS |
|
|
Clicking on Cancel Button |
Brought back to Staff
Information Page |
PASS |
|
|
Clicking on Add Profile
(+Profile) |
Brought to Add Profile Page |
PASS |
|
|
Clicking on Submit Button |
Add Profile Completion
Receipt |
PASS |
|
|
Click Ok Button |
Brought to Staff
Information Page w/ profile added |
PASS |
|
|
Clicking on Cancel Button |
Brought back to Staff
Information Page |
PASS |
|
|
Changing Priority Icon
(Drop Down) |
Moves Folder/Profile to
that spot on page |
PASS |
|
|
Clicking on Modify Button |
Brought to Modify
Folder/Profile page |
PASS |
|
|
Clicking on Submit Button |
Updated Folder/Profile
Completion Receipt |
PASS |
|
|
Click Ok Button |
Brought to Staff
Information Page w/ update added |
PASS |
|
|
Clicking on Cancel Button |
Brought back to Staff
Information Page |
PASS |
|
|
Clicking on Remove Button |
Dialog box shown asking for
deletion confirmation |
PASS |
|
|
Clicking Ok |
Folder/Profile Removed |
PASS |
|
|
Clicking Cancel |
Brought back to Staff
Information Page |
PASS |
|
|
Click Ok |
Brought back to Control
Panel |
PASS |
|
3.10 Test #10: Testing of “Create Tests” Feature
|
Test #10 |
Tested by Brett
Rhymestine, |
|
|
|
[TEST OBJECT] |
[EXPECTED RESULT] |
[PASS] |
[FAIL] |
|
Clicking on Test Score
Entry |
Brought to Test Score Entry
Page |
PASS |
|
|
Clicking on Add Test |
Brought to Add Test Page |
PASS |
|
|
Clicking on Create Button |
Brought to Test Info Page |
PASS |
|
|
Clicking on Submit Button |
Brought to Test Canvas Page |
PASS |
|
|
Clicking on Modify Button |
Brought to modify test info
page |
PASS |
|
|
Clicking on Submit |
Modifications made /
brought back to test canvas |
PASS |
|
|
Clicking on Cancel |
Brought back to test canvas
page |
PASS |
|
|
Clicking on Go Button |
Brought to add/modify
question page |
PASS |
|
|
Clicking Submit |
Brought back to test canvas
with question added |
PASS |
|
|
Clicking Cancel |
Brought back to test canvas
without question added |
PASS |
|
|
Clicking on Ok Button |
Brought back to Add Test
page with it now in the Test box |
PASS |
|
|
Clicking on Submit Button |
Add Test Confirmation
Receipt |
PASS |
|
|
Click Ok |
Test added and available /
Brought to Modify Test Page |
PASS |
|
|
Clicking on Modify Test Options |
Brought to Test Options
Page |
PASS |
|
|
Clicking on Submit Button |
Test options modified
Confirmation Receipt |
PASS |
|
|
Click Ok |
Brought to Modify Test Page
w/ updates done |
PASS |
|
|
Clicking on Cancel Button |
Brought to Modify Test Page |
PASS |
|
|
Click Ok |
Brought to Test Score Entry
with Test Added |
PASS |
|
|
Clicking on Cancel Button |
Test added but not
available / Brought to Test Score Entry |
PASS |
|
|
Click Ok |
Brought back to Control
Panel |
PASS |
|
4.0 Health
Professions Website Manual
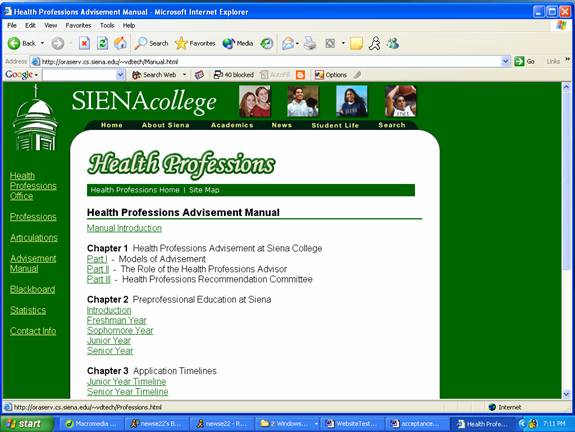
The Health Professions website developed will provide an
extensive amount of information for students outside of
- Health Professions Logo
- Menu Bar
- Site Map
- Better design structure for greater degree of readability
4.1
Website Navigation
By clicking on any of the links in the page, the user will be brought to the appropriate destination. The following are examples from every possible link on the Health Professions website:
4.1.1 Health Professions Homepage
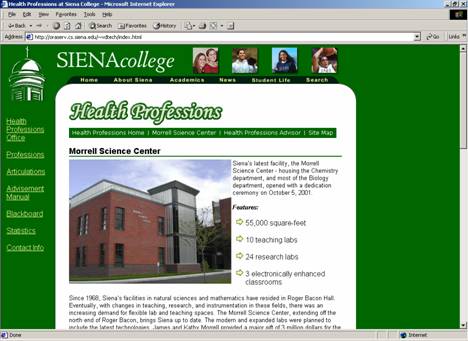
(The menu bar selections –
4.1.2 Health Professions Office
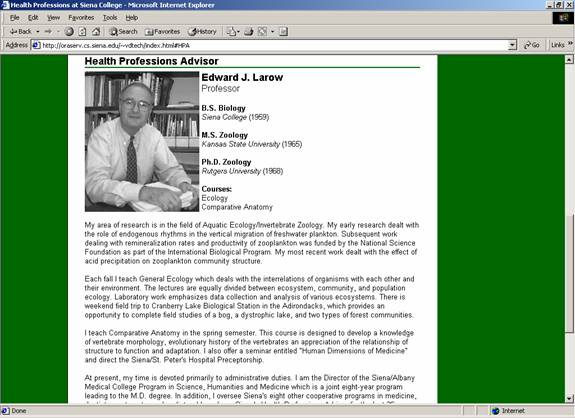
This brings you to information on the Health Professions Advisor, Dr. LaRow. This information is also available from the title bar on the homepage.
4.1.3 Professions
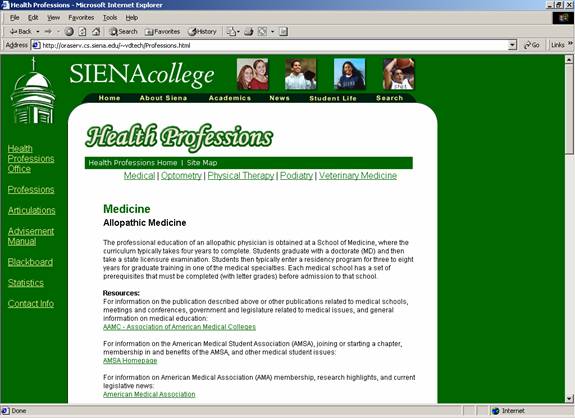
This page provides information on numerous professions, as well as some available resources for aspiring students.
4.1.4 Articulations
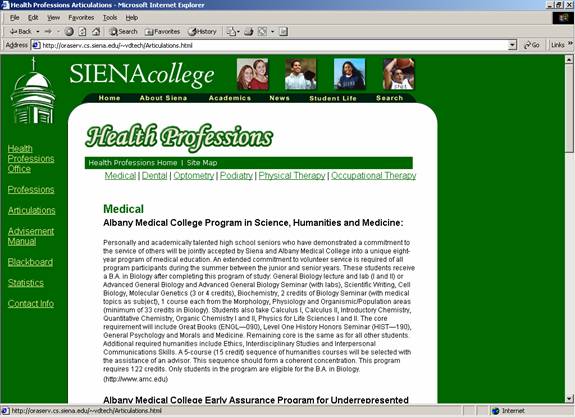
This page contains information on Siena College Health Professions’ affiliations.
4.1.5 Advisement Manual
Here students can download the Health Professions Advisement manual. We have separated each part of the document and made it available in .pdf format for greater compatibility and easier readability. We also have provided a link for a free adobe reader download.
4.1.6 Blackboard Information & Link
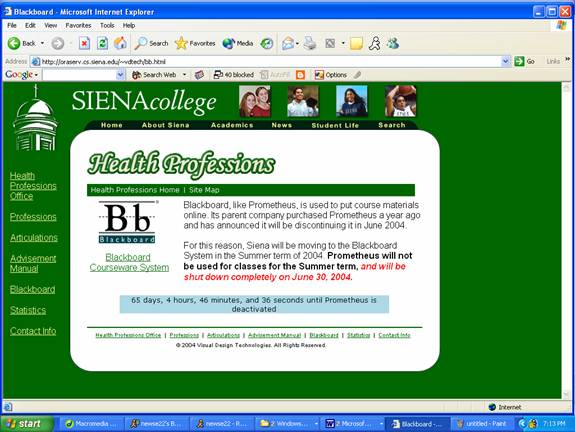
This page provides students with information on Blackboard, and when Prometheus will be deactivated. By clicking on the link, the user will have another display with the Blackboard login screen.
4.1.7 Statistics
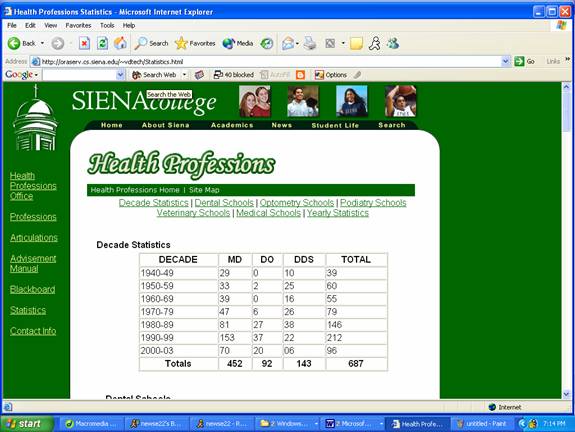
This page provides different Health Professions’ statistics.
4.1.8 Contact Information
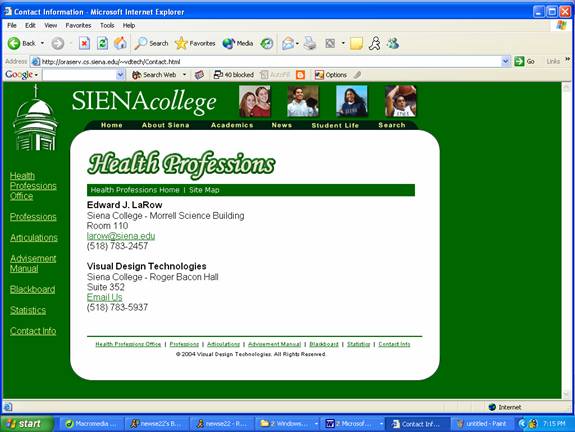
This page has contact information for Dr. LaRow, as well as the team at Visual Design Technologies.
4.1.9 Site Map
A general site map for the website.
4.1.10
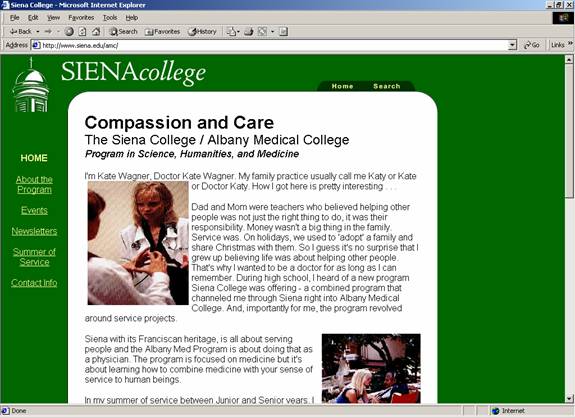
We have also provided a link to the Albany Medical College Program from the sitemap.
5.0 Health
Professions Website Testing
The Website will
serve as a resource that the Health Professions faculty and students can use to
find information related to graduate school, specific professions, and the
Health Professions Department at
5.1 Testing Plan
Six Sections of the Website (each will have
its own page, and link to that page from the home page):
I.
Health
Professions Home Page
II.
Professions
III.
Articulations
IV.
Advisement
Manual
V.
Blackboard
Registration
VI.
Statistics
VII. Contact Page
![]()
5.2 Testing
Criteria
1) Accessibility Testing -
Make sure each page is designed for handicap accessibility.
2) Style and Content Test -Check
to make sure content on each page is correct and that all images and graphics
appear correctly. Make sure styling of content and layout of pages are correct.
3) Browser Compatibility Test
- Check each page on the website in different
browsers and versions
4) Link Test - Test that
each link on the page works, points to the correct page, is styled correctly,
and the link text is correct
5) Top and Side Navigation Test – Test that each link in the Top and Side Navigation work, points to the correct page, styled correctly, the link text is correct, and displayed correctly for Rollover events.
5.3 Test Case Forms
Test Case 1
Health Professions Homepage
|
Test |
|
Pass / Fail |
Comments |
Tested By |
|
Accessibility Testing - |
|
Pass
|
|
|
|
Page Resolution is 1024 x 768 |
|
Pass |
|
|
Style and Content Test - |
|
Pass |
|
|
|
Content on Page is correct |
|
Pass |
|
|
|
All Images are Correct and Visible |
|
Pass |
|
|
|
Content is styled and formatted correctly |
|
Pass |
|
|
|
Content is styled and formatted correctly |
|
Pass |
|
|
|
Browser Compatibility Test - |
|
Pass |
|
|
|
Internet Explorer version 6.0 |
|
Pass |
|
|
|
Netscape Navigator version 7.1 |
|
Pass |
|
|
|
Opera version 7.0 |
|
Pass |
|
|
|
Link Test - |
|
Pass |
|
|
|
No Broken Links on the page |
|
Pass
|
|
|
|
Each Link points to the correct page |
|
Pass |
|
|
|
Each link is styled correctly |
|
Pass |
|
|
|
The text in each link is correct |
|
Pass |
|
|
|
Entire Page has Passed all tests--- |
|
Pass |
|
Date:
|
Test Case 2
Professions
|
Test |
|
Pass / Fail |
Comments |
Tested By |
|
Accessibility Testing - |
|
Pass |
|
|
|
Page Resolution is 1024 x 768 |
|
Pass |
|
|
|
Style and Content Test - |
|
Pass |
|
|
|
Content on Page is correct |
|
Pass |
|
|
|
All Images are Correct and Visible |
|
Pass |
|
|
|
Content is styled and formatted correctly |
|
Pass |
|
|
|
Content is styled and formatted correctly |
|
Pass |
|
|
|
Browser Compatibility Test - |
|
Pass |
|
|
|
Internet Explorer version 6.0 |
|
Pass |
|
|
|
Netscape Navigator version 7.1 |
|
Pass |
|
|
|
Opera version 7.0 |
|
Pass |
|
|
|
Link Test - |
|
Pass |
|
|
|
No Broken Links on the page |
|
Pass |
|
|
|
Each Link points to the correct page |
|
Pass |
|
|
|
Each link is styled correctly |
|
Pass |
|
|
|
The text in each link is correct |
|
Pass |
|
|
|
Entire Page has Passed all tests--- |
|
Pass |
|
Date: |
Test Case 3
Articulations
|
Test |
|
Pass / Fail |
Comments |
Tested By |
|
Accessibility Testing - |
|
Pass |
|
|
|
Page Resolution is 1024 x 768 |
|
Pass |
|
|
|
Style and Content Test - |
|
Pass |
|
|
|
Content on Page is correct |
|
Pass |
|
|
|
All Images are Correct and Visible |
|
Pass |
|
|
|
Content is styled and formatted correctly |
|
Pass |
|
|
|
Content is styled and formatted correctly |
|
Pass |
|
|
|
Browser Compatibility Test - |
|
Pass |
|
|
|
Internet Explorer version 6.0 |
|
Pass |
|
|
|
Netscape Navigator version 7.1 |
|
Pass |
|
|
|
Opera version 7.0 |
|
Pass |
|
|
|
Link Test - |
|
Pass |
|
|
|
No Broken Links on the page |
|
Pass |
|
|
|
Each Link points to the correct page |
|
Pass |
|
|
|
Each link is styled correctly |
|
Pass |
|
|
|
The text in each link is correct |
|
Pass |
|
|
|
Entire Page has Passed all tests--- |
|
Pass |
|
Date: |
Test Case 4
Advisement Manual
|
Test |
|
Pass / Fail |
Comments |
Tested By |
|
Accessibility Testing - |
|
Pass |
|
|
|
Page Resolution is 1024 x 768 |
|
Pass |
|
|
|
Style and Content Test - |
|
Pass |
|
|
|
Content on Page is correct |
|
Pass |
|
|
|
All Images are Correct and Visible |
|
Pass |
|
|
|
Content is styled and formatted correctly |
|
Pass |
|
|
|
Content is styled and formatted correctly |
|
Pass |
|
|
|
Browser Compatibility Test - |
|
Pass |
|
|
|
Internet Explorer version 6.0 |
|
Pass |
|
|
|
Netscape Navigator version 7.1 |
|
Pass |
|
|
|
Opera version 7.0 |
|
Pass |
|
|
|
Link Test - |
|
Pass |
|
|
|
No Broken Links on the page |
|
Pass |
|
|
|
Each Link points to the correct page |
|
Pass |
|
|
|
Each link is styled correctly |
|
Pass |
|
|
|
The text in each link is correct |
|
Pass |
|
|
|
Entire Page has Passed all tests--- |
|
Pass |
|
Date: |
Test Case 5
Blackboard
|
Test |
|
Pass / Fail |
Comments |
Tested By |
|
Accessibility Testing - |
|
Pass |
|
|
|
Page Resolution is 1024 x 768 |
|
Pass |
|
|
|
Style and Content Test - |
|
Pass |
|
|
|
Content on Page is correct |
|
Pass |
|
|
|
All Images are Correct and Visible |
|
Pass |
|
|
|
Content is styled and formatted correctly |
|
Pass |
|
|
|
Content is styled and formatted correctly |
|
Pass |
|
|
|
Browser Compatibility Test - |
|
Pass |
|
|
|
Internet Explorer version 6.0 |
|
Pass |
|
|
|
Netscape Navigator version 7.1 |
|
Pass |
|
|
|
Opera version 7.0 |
|
Pass |
|
|
|
Link Test - |
|
Pass |
|
|
|
No Broken Links on the page |
|
Pass |
|
|
|
Each Link points to the correct page |
|
Pass |
|
|
|
Each link is styled correctly |
|
Pass |
|
|
|
The text in each link is correct |
|
Pass |
|
|
|
Entire Page has Passed all tests--- |
|
Pass |
|
Date: |
Test Case 6
Statistics
|
Test |
|
Pass / Fail |
Comments |
Tested By |
|
Accessibility Testing - |
|
Pass |
|
|
|
Page Resolution is 1024 x 768 |
|
Pass |
|
|
|
Style and Content Test - |
|
Pass |
|
|
|
Content on Page is correct |
|
Pass |
|
|
|
All Images are Correct and Visible |
|
Pass |
|
|
|
Content is styled and formatted Correctly |
|
Pass |
|
|
|
Content is styled and formatted Correctly |
|
Pass |
|
|
|
Browser Compatibility Test - |
|
Pass |
|
|
|
Internet Explorer version 6.0 |
|
Pass |
|
|
|
Netscape Navigator version 7.1 |
|
Pass |
|
|
|
Opera version 7.0 |
|
Pass |
|
|
|
Link Test - |
|
Pass |
|
|
|
No Broken Links on the page |
|
Pass |
|
|
|
Each Link points to the correct page |
|
Pass |
|
|
|
Each link is styled correctly |
|
Pass |
|
|
|
The text in each link is correct |
|
Pass |
|
|
|
Entire Page has Passed all tests--- |
|
Pass |
|
Date: |
Test Case 7
Contact Page
|
Test |
|
Pass / Fail |
Comments |
Tested By |
|
Accessibility Testing - |
|
Pass |
|
|
|
Page Resolution is 1024 x 768 |
|
Pass |
|
|
|
Style and Content Test - |
|
Pass |
|
|
|
Content on Page is correct |
|
Pass |
|
|
|
All Images are Correct and Visible |
|
Pass |
|
|
|
Content is styled and formatted correctly |
|
Pass |
|
|
|
Content is styled and formatted correctly |
|
Pass |
|
|
|
Browser Compatibility Test - |
|
Pass |
|
|
|
Internet Explorer version 6.0 |
|
Pass |
|
|
|
Netscape Navigator version 7.1 |
|
Pass |
|
|
|
Opera version 7.0 |
|
Pass |
|
|
|
Link Test - |
|
Pass |
|
|
|
No Broken Links on the page |
|
Pass |
|
|
|
Each Link points to the correct page |
|
Pass |
|
|
|
Each link is styled correctly |
|
Pass |
|
|
|
The text in each link is correct |
|
Pass |
|
|
|
Entire Page has Passed all tests--- |
|
Pass |
|
Date: |
Test Case 8
Side Links & Top Navigation
|
Test |
|
Pass / Fail |
Comments |
Tested By |
|
Link Style and Content Test - |
|
Pass |
|
|
|
Each Side Link Styled Correctly |
|
Pass |
|
|
|
Each Link in the Top Navigation Styled Correctly |
|
Pass |
|
|
|
Rollovers in Top Navigation are Styled Correctly |
|
Pass |
|
|
|
Link Names are Correct |
|
Pass |
|
|
|
Browser Compatibility Test - |
|
Pass |
|
|
|
Internet Explorer version 6.0 |
|
Pass |
|
|
|
Netscape Navigator version 7.1 |
|
Pass |
|
|
|
Opera version 7.0 |
|
Pass |
|
|
|
Link Test - |
|
Pass |
|
|
|
No Broken Links on Page |
|
Pass |
|
|
|
Each Link points to the correct page |
|
Pass |
|
|
|
Side and Top Navigation has Passed all
tests--- |
|
Pass |
|
Date: |
6.0 Glossary
Database:
A large, organized collection of
information that is accessed via software.
Gantt Chart: A timeline chart that
depicts the schedule of the software development process.
Linear Sequential Model: A systematic,
sequential approach to software development that begins at the system level and
processes through analysis, design, coding, testing, and support. (Also known
as waterfall model)
Software:
Computer program that when executed
provide desire function and performance.
Email: Electronic letters which are sent to people
through an Internet connection.
Account: A user on the
Blackboard system with all personal information stored.+
Information System: An electronic system for storing, editing, and retrieving data.
Security: A website feature included within Blackboard that ensures that all data
transmitted into the system will be encrypted and confidential.
User: Person or persons who operate the software
Login: A prompt within Blackboard in which the user
inputs a user name and password, and is then permitted to view and edit his or
her information.
ITS Department: Information & Technology Services Department at Siena College
Blackboard: A web based information
system used to create, edit, and store MediTrak.
Student: A type
of user for MediTrak.
Instructor: The administrator for
MediTrak. The instructor is also a user of MediTrak.
Course Information Screen: A Blackboard screen showing information about the Health Professions Department.
Health Professions: An academic area at Siena College
Welcome Screen: The screen viewed
immediately after login to Blackboard.
Control Panel: Section of Blackboard permitting the Instructor to act as a system administrator and make any changes he sees fit.
Groups: A list showing the students entered into the MediTrak system. This list
is divided by class year.
Digital Drop Box: Allows students to
exchange files with the instructor.
Data Flow Diagram: A series of diagrams showing the processes and data flow of the project.
Tools: A section in Blackboard, which offers the Student or Instructor complete control of Personal Information amongst other things.
Tutorial: A guide, which shows its reader exactly how to accomplish a certain task.
Pass: A rating, which designates that a specific requirement has been met.
Fail: A rating, which designates that a specific requirement has not been met.