Preliminary Design
Proposed
Project:
Dynamic Network Device Mapping System (DNDMS)
Clients:
Mr. Ken Swarner
Mr. Eric Crossman
Delivered
By:
SKYNET
Software
The
SKYNET Software Team:
Kevin Fealey
Heimdall Imbert
Stephanie Maloney
Trevor March
Andrew Warner
November 27, 2007
Dynamic Network Device
Mapping System (DNDMS)
Preliminary Design
Table of Contents
Section 1: External Design Specifications
Section 2: Architectural Design
Specification
2.3 Functional Requirements Inventory
2.4 Design Environment Information
Section 4: Testing Requirements
Introduction
Our clients, Systems Administrators Ken Swarner and Eric
Crossman, have certain physical limitations when attempting to recover
information regarding components connected to the
The Dynamic Network Device Mapping System (DNDMS) will allow our clients to retrieve information regarding components connected to the network through a web-based building map, so that physical location of the user is irrelevant. Our clients will be able to gather information regarding a specific network device; add, delete, and edit information about devices; and edit user permissions.
Section 1: External Design Specifications
1.1 User Displays
Login: 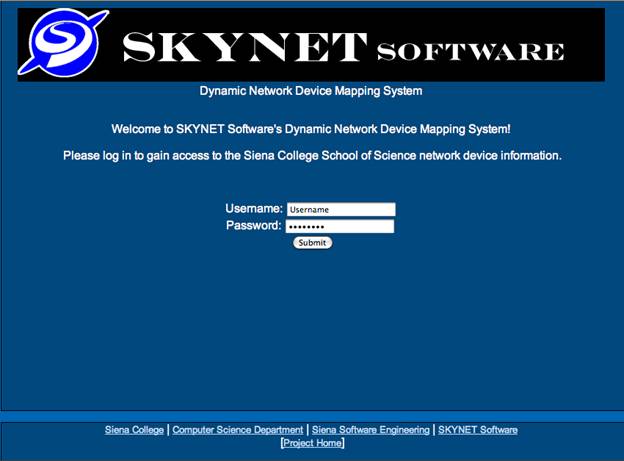
The login page
allows the user to log on. The user can also follow a hyperlink to the
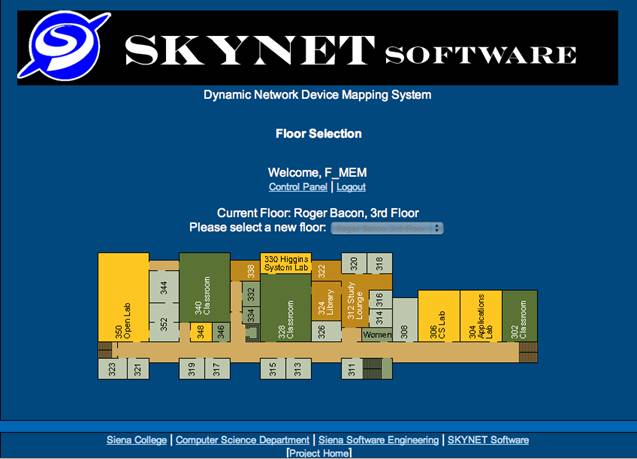
Floor Plan:

The floor plan page will allow the user access to all floors available
to them by use of the drop-down menu. The user can click on any rooms within
their permission set to load the "room view" page. The user can also follow a hyperlink to the
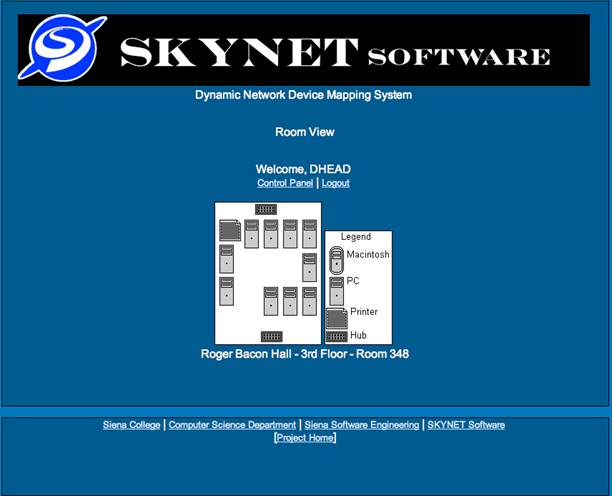
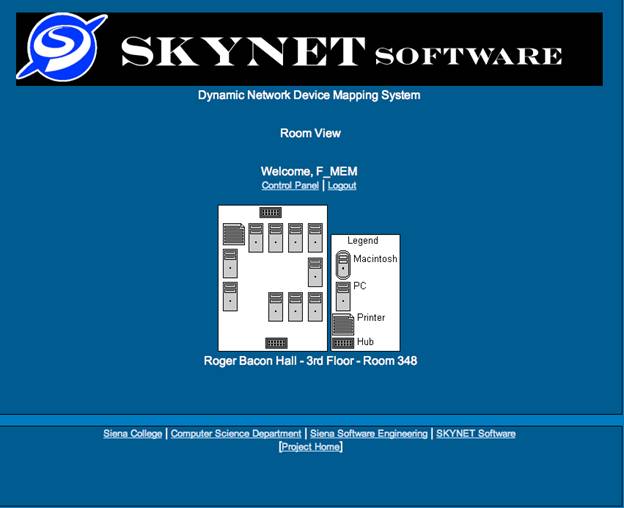
Room View:

The administrator, department head and faculty members will all have
the same view of the room page. The room page will have a description of the
room and the layout for viewing. Since this page doesn’t allow any user to
modify it and is simply for viewing purposes it will show up the same to all
users who have access to the page. The
user can also follow a hyperlink to the Siena College website, the Siena
College Computer Science Department website, the Software Engineering website,
SKYNET Software's website, or the project website.
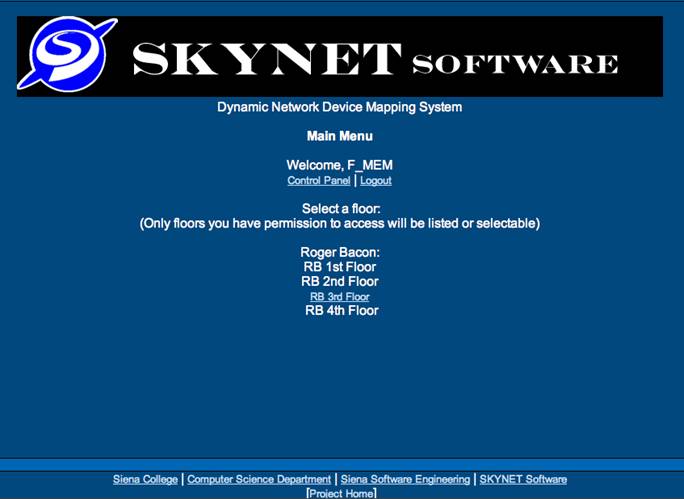
Main Menu:
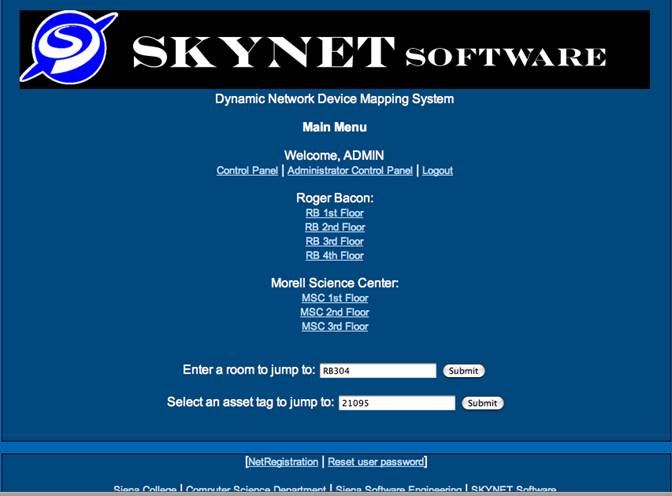
The main menu page contains hyperlinks to each of the available floors
based on the logged-in user's permissions.
The page also contains text boxes to allow the user to easily view
information regarding a specific room or device, without navigating through
multiple levels of links. The user can
also follow a hyperlink to the Siena College website, the Siena College
Computer Science Department website, the Software Engineering website, SKYNET
Software's website, or the project website. Administrators will also have links to add new
devices to the database and reset user passwords.
Admin Control Panel:
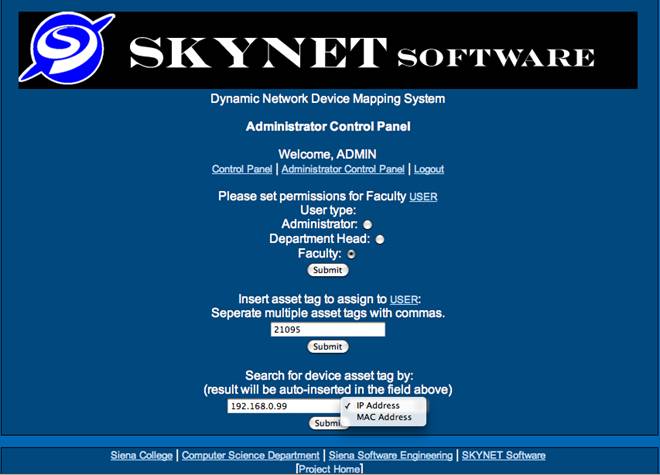
The Administrator control panel allows an administrator to set permissions for any user by choosing if they are an administrator, faculty member, or department head. This page will also allow the administrator to assign one or multiple devices to a user by inputting the device's asset tag. The asset tag for any device can be retrieved from this page also by searching by IP or MAC Address. The user can also follow a hyperlink to the Siena College website, the Siena College Computer Science Department website, the Software Engineering website, SKYNET Software's website, or the project website.
Admin Search:
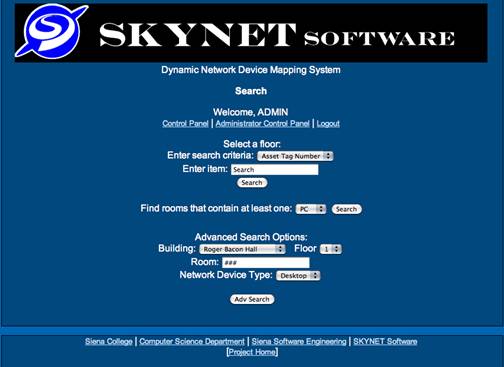
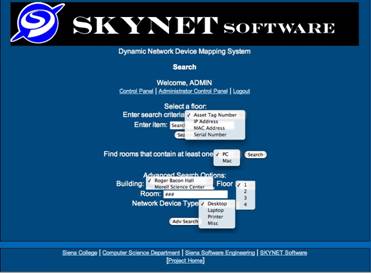
From the search page, an administrator will be able to lookup
information regarding a device by searching by a number of different
characteristics. In addition, the
administrator can view rooms that contain at least one PC or Mac, or search by
building, room, floor, or network device type.
The user can also follow a hyperlink to the Siena College website, the
Siena College Computer Science Department website, the Software Engineering
website, SKYNET Software's website, or the project website.
Admin View Users:
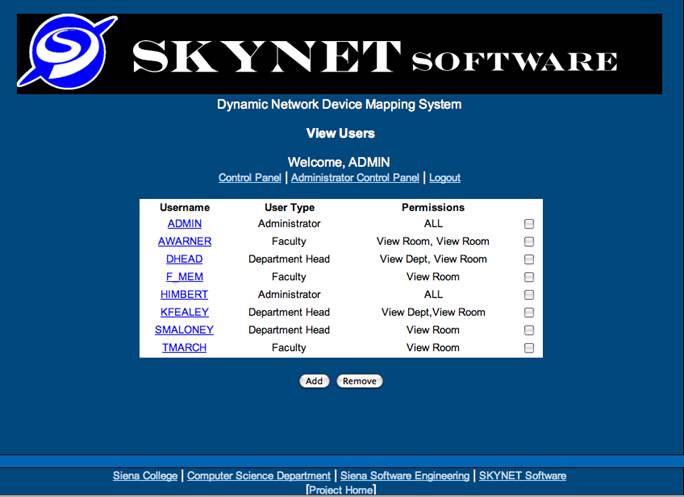
From the View Users page, an administrator will be
able to add or delete users. The
administrator can also follow a link to edit user permissions. The user can also follow a hyperlink to the
Siena College website, the Siena College Computer Science Department website,
the Software Engineering website, SKYNET Software's website, or the project
website.
Department Head Main Menu:
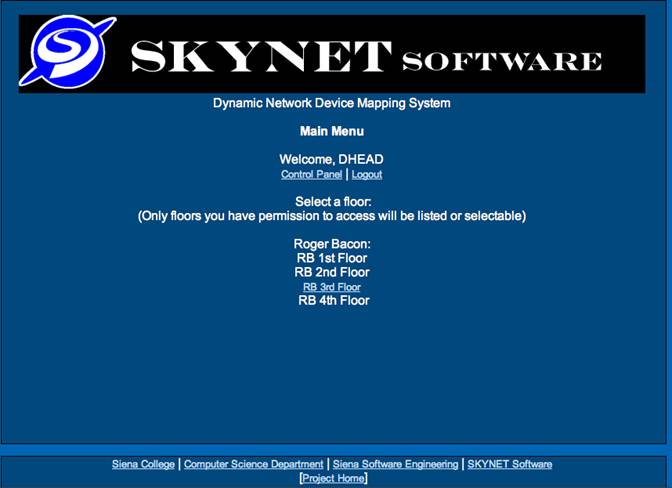
The main menu page contains hyperlinks to each of the available floors based on the logged-in user's permissions. The user can also follow a hyperlink to the Siena College website, the Siena College Computer Science Department website, the Software Engineering website, SKYNET Software's website, or the project website.
Department Head Floor Plan:
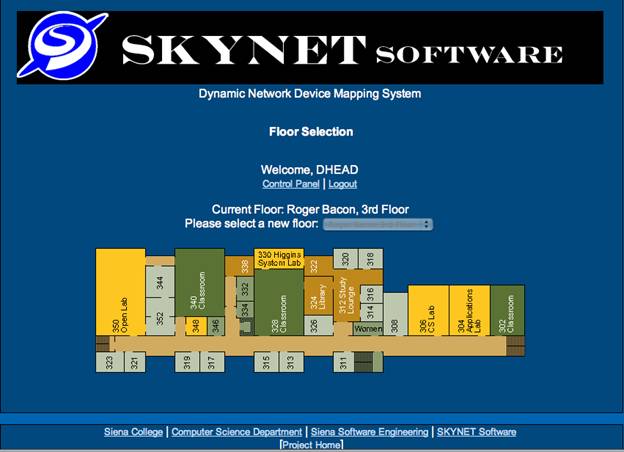
The floor plan page will allow the user access to all floors available to them by use of the drop-down menu. The user can click on any rooms within their permission set to load the "room view" page. The user can also follow a hyperlink to the Siena College website, the Siena College Computer Science Department website, the Software Engineering website, SKYNET Software's website, or the project website.
Department Head Room View:
The administrator, department head and faculty members will all have
the same view of the room page. The room page will have a description of the
room and the layout for viewing. Since this page doesn’t allow any user to
modify it and is simply for viewing purposes it will show up the same to all
users who have access to the page. The
user can also follow a hyperlink to the Siena College website, the Siena
College Computer Science Department website, the Software Engineering website,
SKYNET Software's website, or the project website.
Faculty Main Menu:
The main menu page contains hyperlinks to each of the available floors based on the logged-in user's permissions. The user can also follow a hyperlink to the Siena College website, the Siena College Computer Science Department website, the Software Engineering website, SKYNET Software's website, or the project website.
Faculty Floor Plan:
The floor plan page will allow the user access to all floors available to them by use of the drop-down menu. The user can click on any rooms within their permission set to load the "room view" page. The user can also follow a hyperlink to the Siena College website, the Siena College Computer Science Department website, the Software Engineering website, SKYNET Software's website, or the project website.
Faculty Room View:
The administrator, department head and faculty members will all have the same view of the room page. The room page will have a description of the room and the layout for viewing. Since this page doesn’t allow any user to modify it and is simply for viewing purposes it will show up the same to all users who have access to the page. The user can also follow a hyperlink to the Siena College website, the Siena College Computer Science Department website, the Software Engineering website, SKYNET Software's website, or the project website.
1.2 Data Flow Diagrams
see attached Data Flow Diagram Document
Section 2: Architectural Design Specification
 2.1 Structure Diagram
A Module represents an instruction that carries out an operation.
A Library Module behaves in the same manner every time that it is called upon.

2.2 Use Case Narrative
SKYNET's Dynamic
Network Device Mapping System will provide functionality for three user groups;
Administrator, Department Heads, and Faculty.
Administrators
will have all functions of the program available to them at all times. When an Administrator
logs in, he will be presented with a screen displaying Roger Bacon and Morrell
Science Center. From there, the Administrator can choose to view a
particular floor within one of the two buildings. Once a floor is selected, a visual floor map
will display within the web browser showing all devices connected to the
network. This information will be pulled
from a database, which will be updated any time the administrator makes a
change to the floor map from within the DNDMS.
If the Administrator desires,
he/she can zoom into the floor map to the room level. This way, an Administrator will be able to see all devices connected to the
network from within the DNDMS.
The Administrator
will be given access to make additions and subtractions from the current School
of Science inventory, as well as from the list of currently connected network
components. The Administrator will have the capability to select a room he wants to
move a network device to from a pull-down menu that contains each room number
in the School of Science.
When an Administrator
wants to find a specific computer within the School of Science, they will no
longer have to physically search each room in the buildings. With the DNDMS, Administrators will be able to search through the list of devices
by such attributes as MAC address, serial number, and IP address.
An Administrator
will also have the ability to add and remove Department Heads and Faculty
from the DNDMS. If a new user is hired, the
Administrator can add a new user and
choose that new user’s permissions.
Alternatively, if a user leaves Siena, the Administrator can easily remove that person's permission to the
DNDMS.
Department
Heads will be able to view the network devices in
their entire department. Department Heads
will not be able to make any changes to the floor plan, but can view all
components, within their department, connected to the School of Science
network.
Faculty, which includes anyone who works in the School of Science other than the Administrators and Department Heads, will be able to view the network devices in their office and any printers that are accessible to them. Faculty members will also not have access to make changes to the database or floor plans within the DNDMS – they will have read-only access of the view of their office and printers they may use.
2.3
Functional Requirements Inventory
The following list outlines the required functionality to be included in the final solution. The requirements are listed according to user case and then by screens the user will view.
General:
The Dynamic Network Device Mapping System is web-based.
Administrator
User:
The Administrator user will have an account.
The Administrator user will have a username and password.
The Administrator will establish usernames and passwords for other users.
Login
Page
All
Users:
- The top of the page will contain a line
of text with the name of the software (Dynamic Network Device Management
System).
- There is a text box that will contain a
brief description of the Dynamic Network Device Management Software will
scrolling capability for intricate details about the software.
- The Username input box will be clearly
labeled by a “Username:” line of text
- Immediately after the line of text will
be the actual username box so that the user can input their username.
- There will be a “Password:” line of
text right below the “Username:” line of text to indicate which box to
input the password.
- The password input box is located
immediately after the line of text indicating that it is a password input
box and right below the username input box.
- Below the password box is a submit
button that will allow the user to submit their username and password
after successfully inputting them into the username and password boxes.
- The bottom of the page will contain 4
links reading left to right differentiated by a small vertical line.
- The furthest left link will guide the
user to the Siena College main page.
- The second link from the left will link
the user to the Siena College Computer Science Department web page.
- The second link from the right will
link the user to the Siena Software Engineering page.
- The final link to the right will be a
link to the SKYNET software page where the user will have instant access
to all information related to the project and the team that is producing
the project.
Floor
Plan Page
All
Users:
- The top of the page will contain a line
of text with the name of the software (Dynamic Network Device Management
System).
- There is a text box that will contain a
brief description of the Floor that the current user is on and how the
floor map will work. This will have scrolling capability for intricate
details about the floor map page and description of the floor.
- There is a line of text that welcomes
the user and shows their username which will allow the user to make sure
they are logged on properly under the right username.
- There are now two links separated by a
vertical bar right below the welcome line of text.
- The first link is the Control Panel
link and it is inaccessible to all users.
This will become active when we deem that there is something the
users need to manipulate.
- The second link is a logout link that
will allow the user to logout of their account from this page.
- Below the two links above, there is a
line of text that will indicate the current floor that is being viewed.
- Below the line that indicates the
current floor we are viewing is a line of text that indicates the user can
choose a new floor by selecting a new floor from the drop down box.
- Immediately to the right there is a
dropdown box that will have selected the current floor which will be set
to the same floor as the user’s office is located in. It will allow the
user to access floor maps of other rooms they interact with as well.
- Below the dropdown box is an
interactive image that shows the map of the floor and allows all users to
access their office data by placing their cursor over their room or by
moving their mouse over places they can print to. This way the user will
have access to data regarding their personal PC and printers they can
access.
- The bottom of the page will contain 4
links reading left to right differentiated by a small vertical line.
- The furthest left link will guide the
user to the Siena College main page.
- The second link from the left will link
the user to the Siena College Computer Science Department web page.
- The second link from the right will
link the user to the Siena Software Engineering page.
- The final link to the right will be a
link to the SKYNET software page where the user will have instant access
to all information related to the project and the team that is producing
the project.
Department
Head and Administrator (All accessibility by the Department Head will also
apply to the Administrator):
·
The department head has the additional ability
to select all floors that they manage which includes the offices of faculty in
the department that may not be on their own floor. This will allow the
department head to view the floor map for example on Roger Bacon 2nd
floor, if faculty of that department are located there even if the department
head does not teach or reside on the 2nd floor.
·
The department head will not be restricted to
looking at their own data but will be able to view all room data for all
faculty rooms and accessible printers in their department.
Administrator
Only:
·
Below the welcome text the administrator will
have an additional link located between the control panel and the logout links.
This link is for the Administrator Control Panel.
·
The administrator dropdown box has absolutely no
restrictions and so the administrator will be able to view all floor plans that
are in the database.
·
The administrator will be able to view all the
information in the database for any room on any floor.
Room Plan
Page
All
Users:
- The top of the page will contain a line
of text with the name of the software (Dynamic Network Device Management
System).
- There is a text box that will contain a
brief description of the room that the current user is on and how the room
map will work. This will have scrolling capability for intricate details
about the room map page and description of the room.
- There is a line of text that welcomes
the user and shows their username which will allow the user to make sure
they are logged on properly under the right username.
- There are now two links separated by a
vertical bar right below the welcome line of text.
- The first link is the Control Panel
link and it is inaccessible to all users.
This will become active when we deem that there is something the
users need to manipulate.
- The second link is a logout link that
will allow the user to logout of their account from this page.
- Below the links is an interactive image
that shows the layout of the room and allows all users to access data
about the network devices in that room.
- Below the room layout image is a line
of text that indicates the building, floor, and room number that is being
shown.
- The bottom of the page will contain 4
links reading left to right differentiated by a small vertical line.
- The furthest left link will guide the
user to the Siena College main page.
- The second link from the left will link
the user to the Siena College Computer Science Department web page.
- The second link from the right will
link the user to the Siena Software Engineering page.
- The final link to the right will be a
link to the SKYNET software page where the user will have instant access
to all information related to the project and the team that is producing
the project.
Administrators
Only:
·
Below the welcome text the administrator will
have an additional link located between the control panel and the logout links.
This link is for the Administrator Control Panel.
·
The Administrator will also have additional
functionality like the ability to move network devices in the room, and add or
delete devices to the room.
Menu Page
All
Users:
- The top of the page will contain a line
of text with the name of the software (Dynamic Network Device Management
System).
- There is a text box that will contain a
brief description of the menu and how the menu page will work. This will
have scrolling capability for intricate details about the menu page.
- There is a line of text that welcomes
the user and shows their username which will allow the user to make sure
they are logged on properly under the right username.
- There are now two links separated by a
vertical bar right below the welcome line of text.
- The first link is the Control Panel
link and it is inaccessible to all users.
This will become active when we deem that there is something the
users need to manipulate.
- The second link is a logout link that
will allow the user to logout of their account from this page.
- Below the links is a line of text that
indicates the beginning of a list of links to the different floors in the
buildings.
- Below the line of explanation is a line
explaining the building and then the floors that are located in each
building. The floors that the user’s office is located on and work in will
be accessible.
- The bottom of the page will contain 4
links reading left to right differentiated by a small vertical line.
- The furthest left link will guide the
user to the Siena College main page.
- The second link from the left will link
the user to the Siena College Computer Science Department web page.
- The second link from the right will
link the user to the Siena Software Engineering page.
- The final link to the right will be a
link to the SKYNET software page where the user will have instant access
to all information related to the project and the team that is producing
the project.
Department
Head and Administrator (All accessibility by the Department Head will also
apply to the Administrator):
·
The department head has the additional ability
to select any floors that they manage which includes the offices of faculty in
the department that may not be on their own floor. This will allow the
department head to view the floor map for example on Roger Bacon 2nd
floor, if faculty of that department are located there, even if the department
head does not teach or reside on the 2nd floor.
Administrator
Only:
·
Since the administrator menu options are
integrated into the Administrator Control Panel we will discuss this
section in terms of the Administrator control panel.
Administrator
Control Panel:
Administrator
Only:
·
The administrator Control panel is exactly like
the menu page for the department head with a few upgrades.
·
In the administrator control panel the text that
defines the building name and the links to the separate floors have been shifted
to the left.
·
To the right of the floor links is a line of
text indicated that there will be a text box to accept a room to jump to.
·
After the line of text explaining the room jump
box is the text box where the user can input a room.
·
After the text box is a submit button that
allows the user to go to the room they have just input into the jump box.
·
To the right of the floor links, but below the
text that explains where to enter a room to jump to, is a line of text that
indicates that there will be a text box to accept an asset tag and jump to the
room containing that asset tag.
·
After the line of text explaining where to input
the asset tag is the text box where the user can input the asset tag.
·
After the text box is a submit button that
allows the user to go to the room that contains the asset tag given.
·
Below these two new search criteria are two more
links separated by a vertical line.
·
The first link is a link to the NetRegistration
page that is only accessible by the administrator.
·
The second link is a link to the Reset user
password page which is also only accessible by the administrator.
·
*The bottom of the page will also contain the 4
links that are outlined in the menu pages for all users.
User
Permissions Page
Administrator
Only:
·
The top of the page will contain a line of text
with the name of the software (Dynamic Network Device Management System).
·
There is a text box that will contain a brief
description of the user’s permission page and how the permissions will work.
This will have scrolling capability for intricate details about the permissions
page and how to assign and change permissions.
·
There is a line of text that welcomes the user
and shows their username which will allow the user to make sure they are logged
on properly under the right username.
·
There are now three links separated by vertical
bars right below the welcome line of text.
·
The first link is the Control Panel link and it
is inaccessible to all users. This will
become active when we deem that there is something the users need to
manipulate.
·
The second link is a link to the Administrator
Control Panel.
·
The third link is a logout link that will allow
the administrator to logout of their account from this page.
·
Below the links the site breaks down into two
columns.
·
The first column is located on the left half of
the page and there is a line of text explaining that you can set permissions of
a given user who will be able to be chosen by clicking the USER link at the end
of the line.
·
Below this line is a line of text to show that
there is going to be a list of possible permission options.
·
Now we have listed all three user types in which
one can be selected to give the user
that was selected earlier, either the Administrator, Department Head, or
Faculty permission level.
·
In the second column located to the right of the
first column is a line of text explaining that the upcoming text box will allow
the administrator to apply permissions to a user for an asset tag. The user is
selected by the USER link at the end of the line.
·
Below the line of text is a quick explanation of
how to add multiple asset tags to a users permissions.
·
There will then be a text box that allows the
administrator to input tag numbers they wish to assign to the user.
·
Below the text box will be a submit button to
actually assign the asset tag to the user.
·
Still in the right column under the asset tag
assignment is a line of text explaining that you can search for an asset tag by
IP or MAC address.
·
Under this text is a notice that after searching
for an asset tag by IP the result will show up in the asset tag text box
mentioned previously.
·
There will now be a text box where the
administrator can enter their IP or MAC address.
·
Below the text box is a dropdown menu that
allows the administrator to choose what was just entered into the box above,
either IP or MAC address.
·
The bottom of the page will contain 4 links
reading left to right differentiated by a small vertical line.
·
The furthest left link will guide the user to
the Siena College main page.
·
The second link from the left will link the user
to the Siena College Computer Science Department web page.
·
The second link from the right will link the
user to the Siena Software Engineering page.
·
The final link to the right will be a link to
the SKYNET software page where the user will have instant access to all
information related to the project and the team that is producing the project.
Advanced
Search Page:
Administrator
Only:
·
The top of the page will contain a line of text
with the name of the software (Dynamic Network Device Management System).
·
There is a text box that will contain a brief
description of the search page and how the search page will work. This will
have scrolling capability for intricate details about the search page and how
to properly user all menus and options related to the search page.
·
There is a line of text that welcomes the user
and shows their username which will allow the user to make sure they are logged
on properly under the right username.
·
There are now three links separated by vertical
bars right below the welcome line of text.
·
The first link is the Control Panel link and it
is inaccessible to all users. This will
become active when we deem that there is something the users need to
manipulate.
·
The second link is a link to the Administrator Control
Panel.
·
The third link is a logout link that will allow
the administrator to logout of their account from this page.
·
Below the links is a line that explains to the
user that they will be searching for a network device.
·
Underneath this is a line of text that explains
that the user will be entering search criteria based on a selection from a
dropdown box.
·
Immediately after this line is a dropdown box
that contains searchable options such as Asset Tag Number, IP Address, MAC
Address, or Serial Number.
·
Below the line explaining the dropdown box is a
line showing that the next text box should be filled with the value relative to
the item selected from the dropdown box.
·
This is immediately followed by the text box
that will contain the Asset Tag Number, IP Address, MAC Address, or Serial
Number depending on what the administrator chooses.
·
Below these two boxes is a search button that
will search the database for the value in the input box under the category from
the dropdown menu.
·
After these search criteria is a line explaining
another search criterion, namely the ability to find rooms containing one or
more of a certain network device. The user is to choose the network device they
desire from the dropdown menu located after the line of text.
·
There is a dropdown menu located immediately
after this line of text that allows the user to pick either a PC or a MAC.
·
This is then followed by a search button that
will carry out the search for rooms with at least one PC or MAC.
·
The last search option is mentioned by a short
line of text and is referred to as the advanced search option.
·
The first line explains the first dropdown menu
is for the building.
·
This will be followed by a dropdown menu to
select either Roger Bacon or Morrell science center.
·
The second line explains the second dropdown
menu is for the floor.
·
This is immediately followed by a dropdown that
contains all possible floors for the give building.
·
The third line of text explains the third box is
for inputting the room number.
·
The box immediately after this line is for
inputting the room number that will be searched for in the building of the
first dropdown menu on the floor of the second dropdown menu.
·
The last line explains the last dropdown menu is
to choose between a desktop, laptop, printer or a miscellaneous network device.
·
The dropdown box will be for choosing which
network device the administrator wishes to search for.
·
Below these possible search options is a button
that will search the database given the criteria inputted.
·
The bottom of the page will contain 4 links
reading left to right differentiated by a small vertical line.
·
The furthest left link will guide the user to
the Siena College main page.
·
The second link from the left will link the user
to the Siena College Computer Science Department web page.
·
The second link from the right will link the
user to the Siena Software Engineering page.
·
The final link to the right will be a link to
the SKYNET software page where the user will have instant access to all
information related to the project and the team that is producing the project.
View
Users Page
Administrator
Only:
·
The top of the page will contain a line of text
with the name of the software (Dynamic Network Device Management System).
·
There is a text box that will contain a brief
description of the search page and how the search page will work. This will
have scrolling capability for intricate details about the search page and how
to properly user all menus and options related to the search page.
·
There is a line of text that welcomes the user
and shows their username, which will allow the user to make sure they are
logged on properly under the right username.
·
There are now three links separated by vertical
bars right below the welcome line of text.
·
The first link is the Control Panel link and it
is inaccessible to all users. This will
become active when we deem that there is something the users need to
manipulate.
·
The second link is a link to the Administrator
Control Panel.
o
The third link is a logout link that will allow
the administrator to logout of their account from this page.
o
A white division in the middle of the page will
display a list of users, their user group, their permissions, and a checkbox to
allow the administrator to remove one or more users from the database at a
time.
o
User names in the list will be clickable and
will bring the administrator to a page to edit that user’s permissions.
o
“Add” and “Remove” buttons will appear below the
list of users to allow the administrator to add or remove users from the
database.
·
The bottom of the page will contain 4 links
reading left to right differentiated by a small vertical line.
·
The furthest left link will guide the user to
the Siena College main page.
·
The second link from the left will link the user
to the Siena College Computer Science Department web page.
·
The second link from the right will link the
user to the Siena Software Engineering page.
The final link to
the right will be a link to the SKYNET software page where the user will have
instant access to all information related to the project and the team that is
producing the project.
2.4 Logical Data Dictionary
The following information presents a preliminary description of the data stored in the Dynamic Network Device Mapping System database. The data is presented in a layout of the table structure. Primary Keys are underlined. All tables but the Room, User Permissions, and User Room Permissions are external and will be provided to us by our clients.
Table: User
Fields:
Lname: CHAR(12)
-User's last name
Fname: CHAR(12)
-User's first name
UserGroup: VARCHAR(15)
- group user belongs to i.e. Administrator, Faculty, Department Head
Table: Room
Fields:
Num: VARCHAR(5)
- The room number
Building: CHAR(3)
- The building the room is found in
Department: CHAR(15)
- The department the room is used by
Type: CHAR(10)
- The type of room; i.e. lecture, lab, etc...
EEC: CHAR(1)
- Indicates if the room is an Electronically Enhanced Classroom - Y/N
Table: Machine
Fields:
Id: INTEGER
- A unique identifier
Host_Name: VARCHAR(30)
- The hostname of the machine
IP_Address: VARCHAR(15)
- The IP Address of the machine
MAC_Address: VARCHAR(20)
- The MAC Address of the machine
Asset_Tag: INTEGER
- The IT&S Asset Tag value
Serial_Num: VARCHAR(20)
- The machine's serial number
Department: CHAR(15)
- The department to which the machine belongs (the sub-network)
Building: CHAR(3)
- The building in which the machine is located
Room: VARCHAR(5)
- The room in which the machine is located
CPU: VARCHAR(6)
- The CPU type
Speed: VARCHAR(6)
- The speed of the processor
Disk: VARCHAR(5)
- The disk size
Memory: VARCHAR(5)
- The memory size
User: CHAR(12)
- The name of the primary user
User_Type: CHAR(15)
- The type of primary user; i.e. student, faculty, etc...
Priority: CHAR(1)
- Priority level; L-low; M- medium; H-High
PO_Num: VARCHAR(15)
- Purchase order number
VP_Code: CHAR(4)
- Always VPAA for Vice President of Academic Affairs
Manufacturer: CHAR(15)
- The name of the manufacturing company
Model: VARCHAR(15)
- The model number of the machine
Equipment_Type: CHAR(20)
- The type of equipment; i.e. PC, Mac, Laptop, Wireless Access Point, etc.
Monitor_Type: CHAR(5)
- The type of monitor; i.e. LCD, CRT
Purchase_Year: DATE
- The date the machine/equipment was purchased
Installed_Date: DATE
- The date the machine/equipment was installed
Comments: VARCHAR(100)
- Comments about the machine/equipment
Table: User
Permissions
Fields:
UserLname: CHAR(12)
-User's last name
UserFname: CHAR(12)
-User's first name
MachineId: INTEGER
- A unique identifier
Table: User Room
Permissions
Fields:
UserLname: CHAR(12)
-User's last name
UserFname: CHAR(12)
-User's first name
RoomNum: VARCHAR(5)
- The room number that the user has access to
2.6 Design Environment Information
The machines we will be using to do our development work, and their specifications, as well as the software that we will be using to develop our programs are listed here.
Server:
Oracle, version 10g
Mysql, version 4.1.14
PHP, version 4.3.11
Apache, version 2.0.46
Browser Environment:
Microsoft Internet Explorer version 6.0.2800.1106
Mozilla Firefox version 1.0 preview release
Mozilla Firefox version 1.0
Apple Safari 1.2
Software:
Adobe Acrobat version 5.0.5
Adobe Reader version 6.0.0
Microsoft Office Word 2000 9.0.4402
Microsoft Office PowerPoint 2000 SR1 9.0.3821
WinSCP version 3.1.0 (Build 165)
Putty Release 0.53b
Macromedia Dreamweaver MX Education Edition 6.0
Macromedia Fireworks MX Education Edition 6.0
Visible Analyst Education Edition version 7.5.5
Microsoft Project 2000 9.0.2001.0219SR1
Microsoft Windows 2000 5.00.2195 Service Pack 3
Microsoft Windows XP Professional Version 2002 Service Pack 2
Systems:
Dell Dimension Dim4550
Intel Pentium 4 2.40 GHz
512 MB of RAM
Macintosh iMac
2.0GHz Intel Core 2 Duo
1GB of RAM
Section 4: Testing Requirements
4.1 Unit Test
see attached Unit Test Document
4.2 Acceptance Test
Functional Requirements
The following list outlines the required functionality to be included in the final solution. The requirements are listed according to user case and then by screens the user will view.
General:
The Dynamic Network Device Mapping System is web-based.
Administrator User:
The Administrator user will have an account.
The Administrator user will have a username and password.
The Administrator will establish usernames and passwords for other users.
Login Page
All Users:
- The
top of the page will contain a line of text with the name of the software
(Dynamic Network Device Management System).
- There
is a text box that will contain a brief description of the Dynamic Network
Device Management Software will scrolling capability for intricate details
about the software.
- The
Username input box will be clearly labeled by a “Username:” line of text
- Immediately
after the line of text will be the actual username box so that the user
can input their username.
- There
will be a “Password:” line of text right below the “Username:” line of
text to indicate which box to input the password.
- The
password input box is located immediately after the line of text
indicating that it is a password input box and right below the username
input box.
- Below
the password box is a submit button that will allow the user to submit
their username and password after successfully inputting them into the
username and password boxes.
- The
bottom of the page will contain 4 links reading left to right
differentiated by a small vertical line.
- The
furthest left link will guide the user to the Siena College main page.
- The
second link from the left will link the user to the Siena College Computer
Science Department web page.
- The
second link from the right will link the user to the Siena Software
Engineering page.
- The
final link to the right will be a link to the SKYNET software page where
the user will have instant access to all information related to the
project and the team that is producing the project.
Floor Plan Page
All Users:
- The
top of the page will contain a line of text with the name of the software
(Dynamic Network Device Management System).
- There
is a text box that will contain a brief description of the Floor that the
current user is on and how the floor map will work. This will have
scrolling capability for intricate details about the floor map page and
description of the floor.
- There
is a line of text that welcomes the user and shows their username which
will allow the user to make sure they are logged on properly under the
right username.
- There
are now two links separated by a vertical bar right below the welcome line
of text.
- The
first link is the Control Panel link and it is inaccessible to all
users. This will become active when
we deem that there is something the users need to manipulate.
- The
second link is a logout link that will allow the user to logout of their
account from this page.
- Below
the two links above, there is a line of text that will indicate the
current floor that is being viewed.
- Below
the line that indicates the current floor we are viewing is a line of text
that indicates the user can choose a new floor by selecting a new floor
from the drop down box.
- Immediately
to the right there is a dropdown box that will have selected the current
floor which will be set to the same floor as the user’s office is located
in. It will allow the user to access floor maps of other rooms they
interact with as well.
- Below
the dropdown box is an interactive image that shows the map of the floor
and allows all users to access their office data by placing their cursor
over their room or by moving their mouse over places they can print to.
This way the user will have access to data regarding their personal PC and
printers they can access.
- The
bottom of the page will contain 4 links reading left to right
differentiated by a small vertical line.
- The
furthest left link will guide the user to the Siena College main page.
- The
second link from the left will link the user to the Siena College Computer
Science Department web page.
- The
second link from the right will link the user to the Siena Software Engineering
page.
- The
final link to the right will be a link to the SKYNET software page where
the user will have instant access to all information related to the
project and the team that is producing the project.
Department Head and Administrator (All accessibility by the Department
Head will also apply to the Administrator):
·
The department head has the additional ability
to select all floors that they manage which includes the offices of faculty in
the department that may not be on their own floor. This will allow the
department head to view the floor map for example on Roger Bacon 2nd
floor, if faculty of that department are located there even if the department
head does not teach or reside on the 2nd floor.
·
The department head will not be restricted to
looking at their own data but will be able to view all room data for all
faculty rooms and accessible printers in their department.
Administrator Only:
·
Below the welcome text the administrator will
have an additional link located between the control panel and the logout links.
This link is for the Administrator Control Panel.
·
The administrator dropdown box has absolutely no
restrictions and so the administrator will be able to view all floor plans that
are in the database.
·
The administrator will be able to view all the
information in the database for any room on any floor.
Room Plan Page
All Users:
- The
top of the page will contain a line of text with the name of the software
(Dynamic Network Device Management System).
- There
is a text box that will contain a brief description of the room that the
current user is on and how the room map will work. This will have
scrolling capability for intricate details about the room map page and
description of the room.
- There
is a line of text that welcomes the user and shows their username which
will allow the user to make sure they are logged on properly under the
right username.
- There
are now two links separated by a vertical bar right below the welcome line
of text.
- The
first link is the Control Panel link and it is inaccessible to all
users. This will become active when
we deem that there is something the users need to manipulate.
- The
second link is a logout link that will allow the user to logout of their
account from this page.
- Below
the links is an interactive image that shows the layout of the room and
allows all users to access data about the network devices in that room.
- Below
the room layout image is a line of text that indicates the building,
floor, and room number that is being shown.
- The
bottom of the page will contain 4 links reading left to right
differentiated by a small vertical line.
- The
furthest left link will guide the user to the Siena College main page.
- The
second link from the left will link the user to the Siena College Computer
Science Department web page.
- The
second link from the right will link the user to the Siena Software
Engineering page.
- The
final link to the right will be a link to the SKYNET software page where
the user will have instant access to all information related to the project
and the team that is producing the project.
Administrators Only:
·
Below the welcome text the administrator will
have an additional link located between the control panel and the logout links.
This link is for the Administrator Control Panel.
·
The Administrator will also have additional
functionality like the ability to move network devices in the room, and add or
delete devices to the room.
Menu Page
All Users:
- The
top of the page will contain a line of text with the name of the software
(Dynamic Network Device Management System).
- There
is a text box that will contain a brief description of the menu and how
the menu page will work. This will have scrolling capability for intricate
details about the menu page.
- There
is a line of text that welcomes the user and shows their username which
will allow the user to make sure they are logged on properly under the
right username.
- There
are now two links separated by a vertical bar right below the welcome line
of text.
- The
first link is the Control Panel link and it is inaccessible to all
users. This will become active when
we deem that there is something the users need to manipulate.
- The
second link is a logout link that will allow the user to logout of their
account from this page.
- Below
the links is a line of text that indicates the beginning of a list of
links to the different floors in the buildings.
- Below
the line of explanation is a line explaining the building and then the
floors that are located in each building. The floors that the user’s
office is located on and work in will be accessible.
- The
bottom of the page will contain 4 links reading left to right
differentiated by a small vertical line.
- The
furthest left link will guide the user to the Siena College main page.
- The
second link from the left will link the user to the Siena College Computer
Science Department web page.
- The
second link from the right will link the user to the Siena Software
Engineering page.
- The
final link to the right will be a link to the SKYNET software page where
the user will have instant access to all information related to the
project and the team that is producing the project.
Department Head and Administrator (All accessibility by the Department
Head will also apply to the Administrator):
·
The department head has the additional ability
to select any floors that they manage which includes the offices of faculty in
the department that may not be on their own floor. This will allow the
department head to view the floor map for example on Roger Bacon 2nd
floor, if faculty of that department are located there, even if the department
head does not teach or reside on the 2nd floor.
Administrator Only:
·
Since the administrator menu options are
integrated into the Administrator Control Panel we will discuss this
section in terms of the Administrator control panel.
Administrator Control Panel:
Administrator Only:
·
The administrator Control panel is exactly like
the menu page for the department head with a few upgrades.
·
In the administrator control panel the text that
defines the building name and the links to the separate floors have been
shifted to the left.
·
To the right of the floor links is a line of
text indicated that there will be a text box to accept a room to jump to.
·
After the line of text explaining the room jump
box is the text box where the user can input a room.
·
After the text box is a submit button that
allows the user to go to the room they have just input into the jump box.
·
To the right of the floor links, but below the
text that explains where to enter a room to jump to, is a line of text that
indicates that there will be a text box to accept an asset tag and jump to the
room containing that asset tag.
·
After the line of text explaining where to input
the asset tag is the text box where the user can input the asset tag.
·
After the text box is a submit button that
allows the user to go to the room that contains the asset tag given.
·
Below these two new search criteria are two more
links separated by a vertical line.
·
The first link is a link to the NetRegistration
page that is only accessible by the administrator.
·
The second link is a link to the Reset user
password page which is also only accessible by the administrator.
·
*The bottom of the page will also contain the 4
links that are outlined in the menu pages for all users.
User Permissions Page
Administrator Only:
·
The top of the page will contain a line of text
with the name of the software (Dynamic Network Device Management System).
·
There is a text box that will contain a brief
description of the user’s permission page and how the permissions will work.
This will have scrolling capability for intricate details about the permissions
page and how to assign and change permissions.
·
There is a line of text that welcomes the user
and shows their username which will allow the user to make sure they are logged
on properly under the right username.
·
There are now three links separated by vertical
bars right below the welcome line of text.
·
The first link is the Control Panel link and it
is inaccessible to all users. This will
become active when we deem that there is something the users need to
manipulate.
·
The second link is a link to the Administrator
Control Panel.
·
The third link is a logout link that will allow
the administrator to logout of their account from this page.
·
Below the links the site breaks down into two
columns.
·
The first column is located on the left half of
the page and there is a line of text explaining that you can set permissions of
a given user who will be able to be chosen by clicking the USER link at the end
of the line.
·
Below this line is a line of text to show that
there is going to be a list of possible permission options.
·
Now we have listed all three user types in which
one can be selected to give the user
that was selected earlier, either the Administrator, Department Head, or
Faculty permission level.
·
In the second column located to the right of the
first column is a line of text explaining that the upcoming text box will allow
the administrator to apply permissions to a user for an asset tag. The user is
selected by the USER link at the end of the line.
·
Below the line of text is a quick explanation of
how to add multiple asset tags to a users permissions.
·
There will then be a text box that allows the
administrator to input tag numbers they wish to assign to the user.
·
Below the text box will be a submit button to
actually assign the asset tag to the user.
·
Still in the right column under the asset tag
assignment is a line of text explaining that you can search for an asset tag by
IP or MAC address.
·
Under this text is a notice that after searching
for an asset tag by IP the result will show up in the asset tag text box
mentioned previously.
·
There will now be a text box where the
administrator can enter their IP or MAC address.
·
Below the text box is a dropdown menu that
allows the administrator to choose what was just entered into the box above,
either IP or MAC address.
·
The bottom of the page will contain 4 links
reading left to right differentiated by a small vertical line.
·
The furthest left link will guide the user to
the Siena College main page.
·
The second link from the left will link the user
to the Siena College Computer Science Department web page.
·
The second link from the right will link the
user to the Siena Software Engineering page.
·
The final link to the right will be a link to
the SKYNET software page where the user will have instant access to all
information related to the project and the team that is producing the project.
Advanced Search Page:
Administrator Only:
·
The top of the page will contain a line of text
with the name of the software (Dynamic Network Device Management System).
·
There is a text box that will contain a brief
description of the search page and how the search page will work. This will
have scrolling capability for intricate details about the search page and how
to properly user all menus and options related to the search page.
·
There is a line of text that welcomes the user
and shows their username which will allow the user to make sure they are logged
on properly under the right username.
·
There are now three links separated by vertical
bars right below the welcome line of text.
·
The first link is the Control Panel link and it
is inaccessible to all users. This will
become active when we deem that there is something the users need to
manipulate.
·
The second link is a link to the Administrator
Control Panel.
·
The third link is a logout link that will allow
the administrator to logout of their account from this page.
·
Below the links is a line that explains to the
user that they will be searching for a network device.
·
Underneath this is a line of text that explains
that the user will be entering search criteria based on a selection from a
dropdown box.
·
Immediately after this line is a dropdown box
that contains searchable options such as Asset Tag Number, IP Address, MAC
Address, or Serial Number.
·
Below the line explaining the dropdown box is a
line showing that the next text box should be filled with the value relative to
the item selected from the dropdown box.
·
This is immediately followed by the text box
that will contain the Asset Tag Number, IP Address, MAC Address, or Serial
Number depending on what the administrator chooses.
·
Below these two boxes is a search button that
will search the database for the value in the input box under the category from
the dropdown menu.
·
After these search criteria is a line explaining
another search criterion, namely the ability to find rooms containing one or
more of a certain network device. The user is to choose the network device they
desire from the dropdown menu located after the line of text.
·
There is a dropdown menu located immediately
after this line of text that allows the user to pick either a PC or a MAC.
·
This is then followed by a search button that
will carry out the search for rooms with at least one PC or MAC.
·
The last search option is mentioned by a short
line of text and is referred to as the advanced search option.
·
The first line explains the first dropdown menu
is for the building.
·
This will be followed by a dropdown menu to
select either Roger Bacon or Morrell science center.
·
The second line explains the second dropdown
menu is for the floor.
·
This is immediately followed by a dropdown that
contains all possible floors for the give building.
·
The third line of text explains the third box is
for inputting the room number.
·
The box immediately after this line is for
inputting the room number that will be searched for in the building of the
first dropdown menu on the floor of the second dropdown menu.
·
The last line explains the last dropdown menu is
to choose between a desktop, laptop, printer or a miscellaneous network device.
·
The dropdown box will be for choosing which
network device the administrator wishes to search for.
·
Below these possible search options is a button
that will search the database given the criteria inputted.
·
The bottom of the page will contain 4 links
reading left to right differentiated by a small vertical line.
·
The furthest left link will guide the user to
the Siena College main page.
·
The second link from the left will link the user
to the Siena College Computer Science Department web page.
·
The second link from the right will link the
user to the Siena Software Engineering page.
·
The final link to the right will be a link to
the SKYNET software page where the user will have instant access to all
information related to the project and the team that is producing the project.
View Users Page
Administrator Only:
·
The top of the page will contain a line of text
with the name of the software (Dynamic Network Device Management System).
·
There is a text box that will contain a brief
description of the search page and how the search page will work. This will
have scrolling capability for intricate details about the search page and how
to properly user all menus and options related to the search page.
·
There is a line of text that welcomes the user
and shows their username, which will allow the user to make sure they are
logged on properly under the right username.
·
There are now three links separated by vertical
bars right below the welcome line of text.
·
The first link is the Control Panel link and it
is inaccessible to all users. This will
become active when we deem that there is something the users need to
manipulate.
·
The second link is a link to the Administrator
Control Panel.
·
The third link is a logout link that will allow
the administrator to logout of their account from this page.
·
A white division in the middle of the page will
display a list of users, their user group, their permissions, and a checkbox to
allow the administrator to remove one or more users from the database at a
time.
·
User names in the list will be clickable and
will bring the administrator to a page to edit that user’s permissions.
·
“Add” and “Remove” buttons will appear below the
list of users to allow the administrator to add or remove users from the
database.
·
The bottom of the page will contain 4 links
reading left to right differentiated by a small vertical line.
·
The furthest left link will guide the user to
the Siena College main page.
·
The second link from the left will link the user
to the Siena College Computer Science Department web page.
· The second link from the right will link the user to the Siena Software Engineering page.
· The final link to the right will be a link to the SKYNET software page where the user will have instant access to all information related to the project and the team that is producing the project.
Non-Functional Requirements
We do not have any Non-Functional Requirements defined at this time.
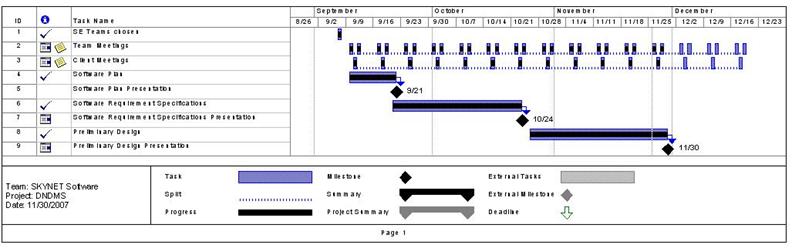
Section 5: Gantt Chart
Section 6: Glossary of Terms
Central
Processing Unit (CPU) – A logic machine that allows a computer
to execute computer programs.
Component
/ Device - Any physical piece of a computer, including the circuitry
inside of it.
Data
Flow Diagram - A graphical representation of the flow of data through an
information system.
Database
– A
structured collection of records or data.
Gantt
Chart - A type of bar chart that illustrates a project schedule.
Linear
Sequential Model / Classic Waterfall Model – A
sequential software development model in which development is seen as flowing
steadily downwards (like a waterfall) through various phases.
Local
Area Network (LAN) - A small computer network covering a small geographic
area like a home, office, or building(s).
MAC
Address - A 48-bit hexadecimal (12 characters) number given to a
device in a network. The address is normally assigned to a device, such as a
network card, when it is manufactured.
Media Access Control (MAC) - A data
protocol that provides addressing and channel access control mechanisms that
make it possible for several terminals or network nodes to communicate within a
multipoint network (typically a local area network (LAN)).
Network
Device - A component/device that is on a network (Printer,
computer, scanner, etc.).
PHP
– A programming language used mainly in generating dynamic
web pages and in server-side scripting.
Prototype – An original type, form, or instance of an object serving as
a typical example or standard for other objects of the same category.
Virtual
-
An entity that exists in a form that is not natural.
Users Group - A collection of logins that will have the same permissions given to them.